Making 3D Printed Playing Cards
Posted 1/6/2025
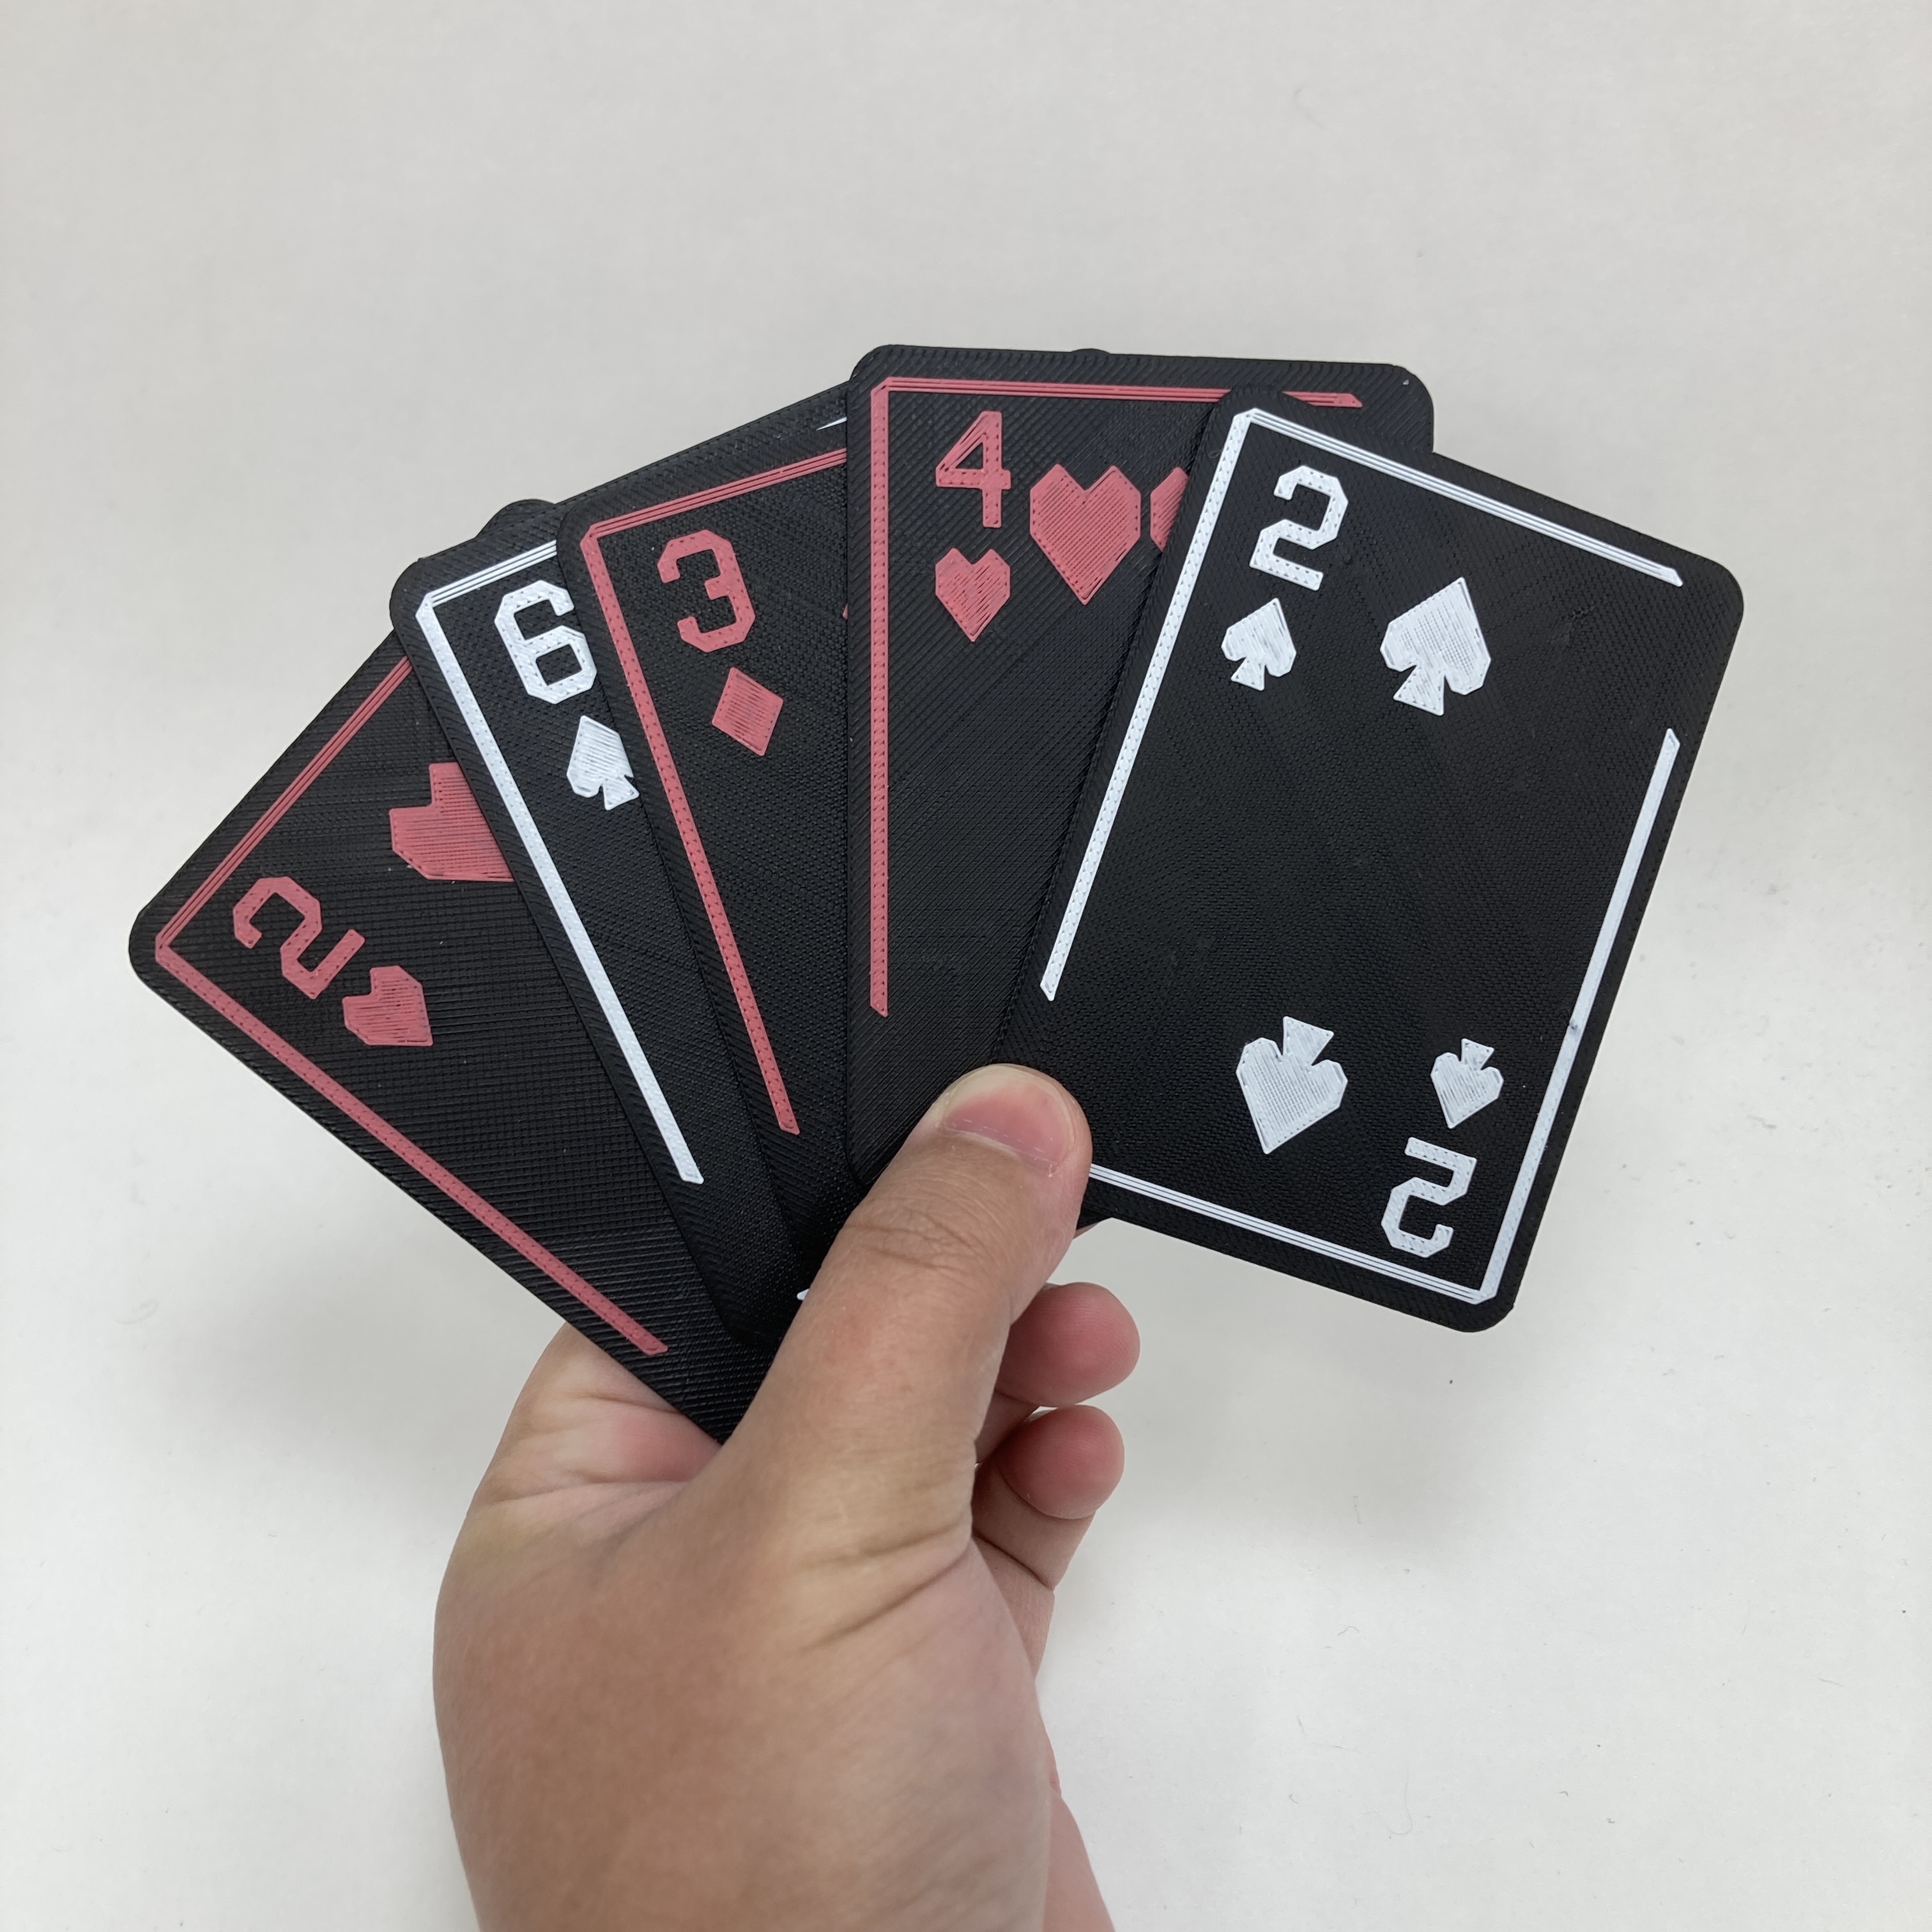
i spent some time over the past week making these babies. but it was a fucking time so i'm gonna tell you how i did it.
i love playing cards
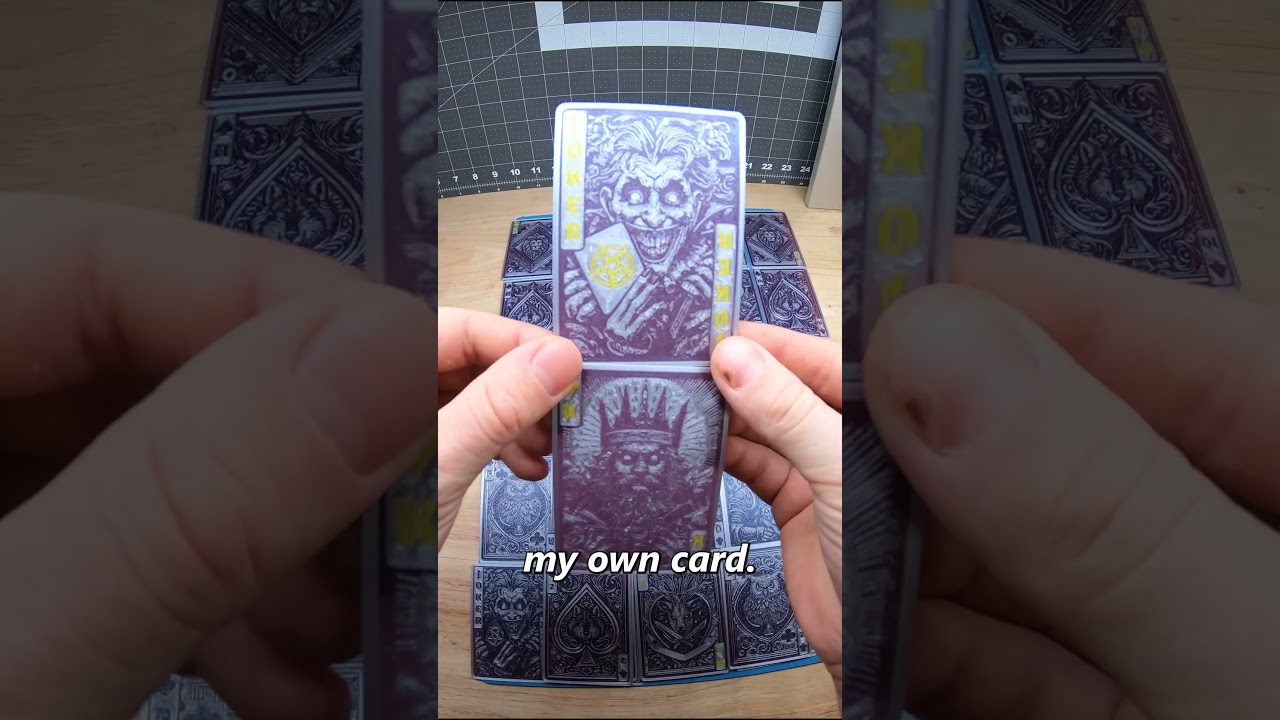
if you've known me for more than 10 minutes, you will probably know this. i also collect playing cards of all kinds. i don't collect french playing cards anymore unless the design is standout/unique in some way. and then i came across this video:
i wanted them. i wanted 3d printed playing cards and they look so good! i found the model from the maker on Cults3D and bought the design, loaded it into my slicer and found out, this design is best formatted for multi-filament printers.
i don't have a multi-filament printer. i could go buy the add on that allows that for $250, but i don't have $250 to drop on that upgrade right now. but i still want my 3d printed cards.
examining the file in the slicer and watching the preview play out made me realize that the way that this is printed is that there are specific base color layers and then the additional color layers. the logic was that if i printed the base layers, then switched the color of my filament halfway through the print, then let it continue printing then i could get the color in.
i use a bambu a1 mini and they have a really convenient thing where you can pause a print at a specific layer and then the print will pick right up where you left off. really nice. (you right click the layer preview bar on the right side of the preview window in the slicer and click "add pause" if you didn't know how to do that.)
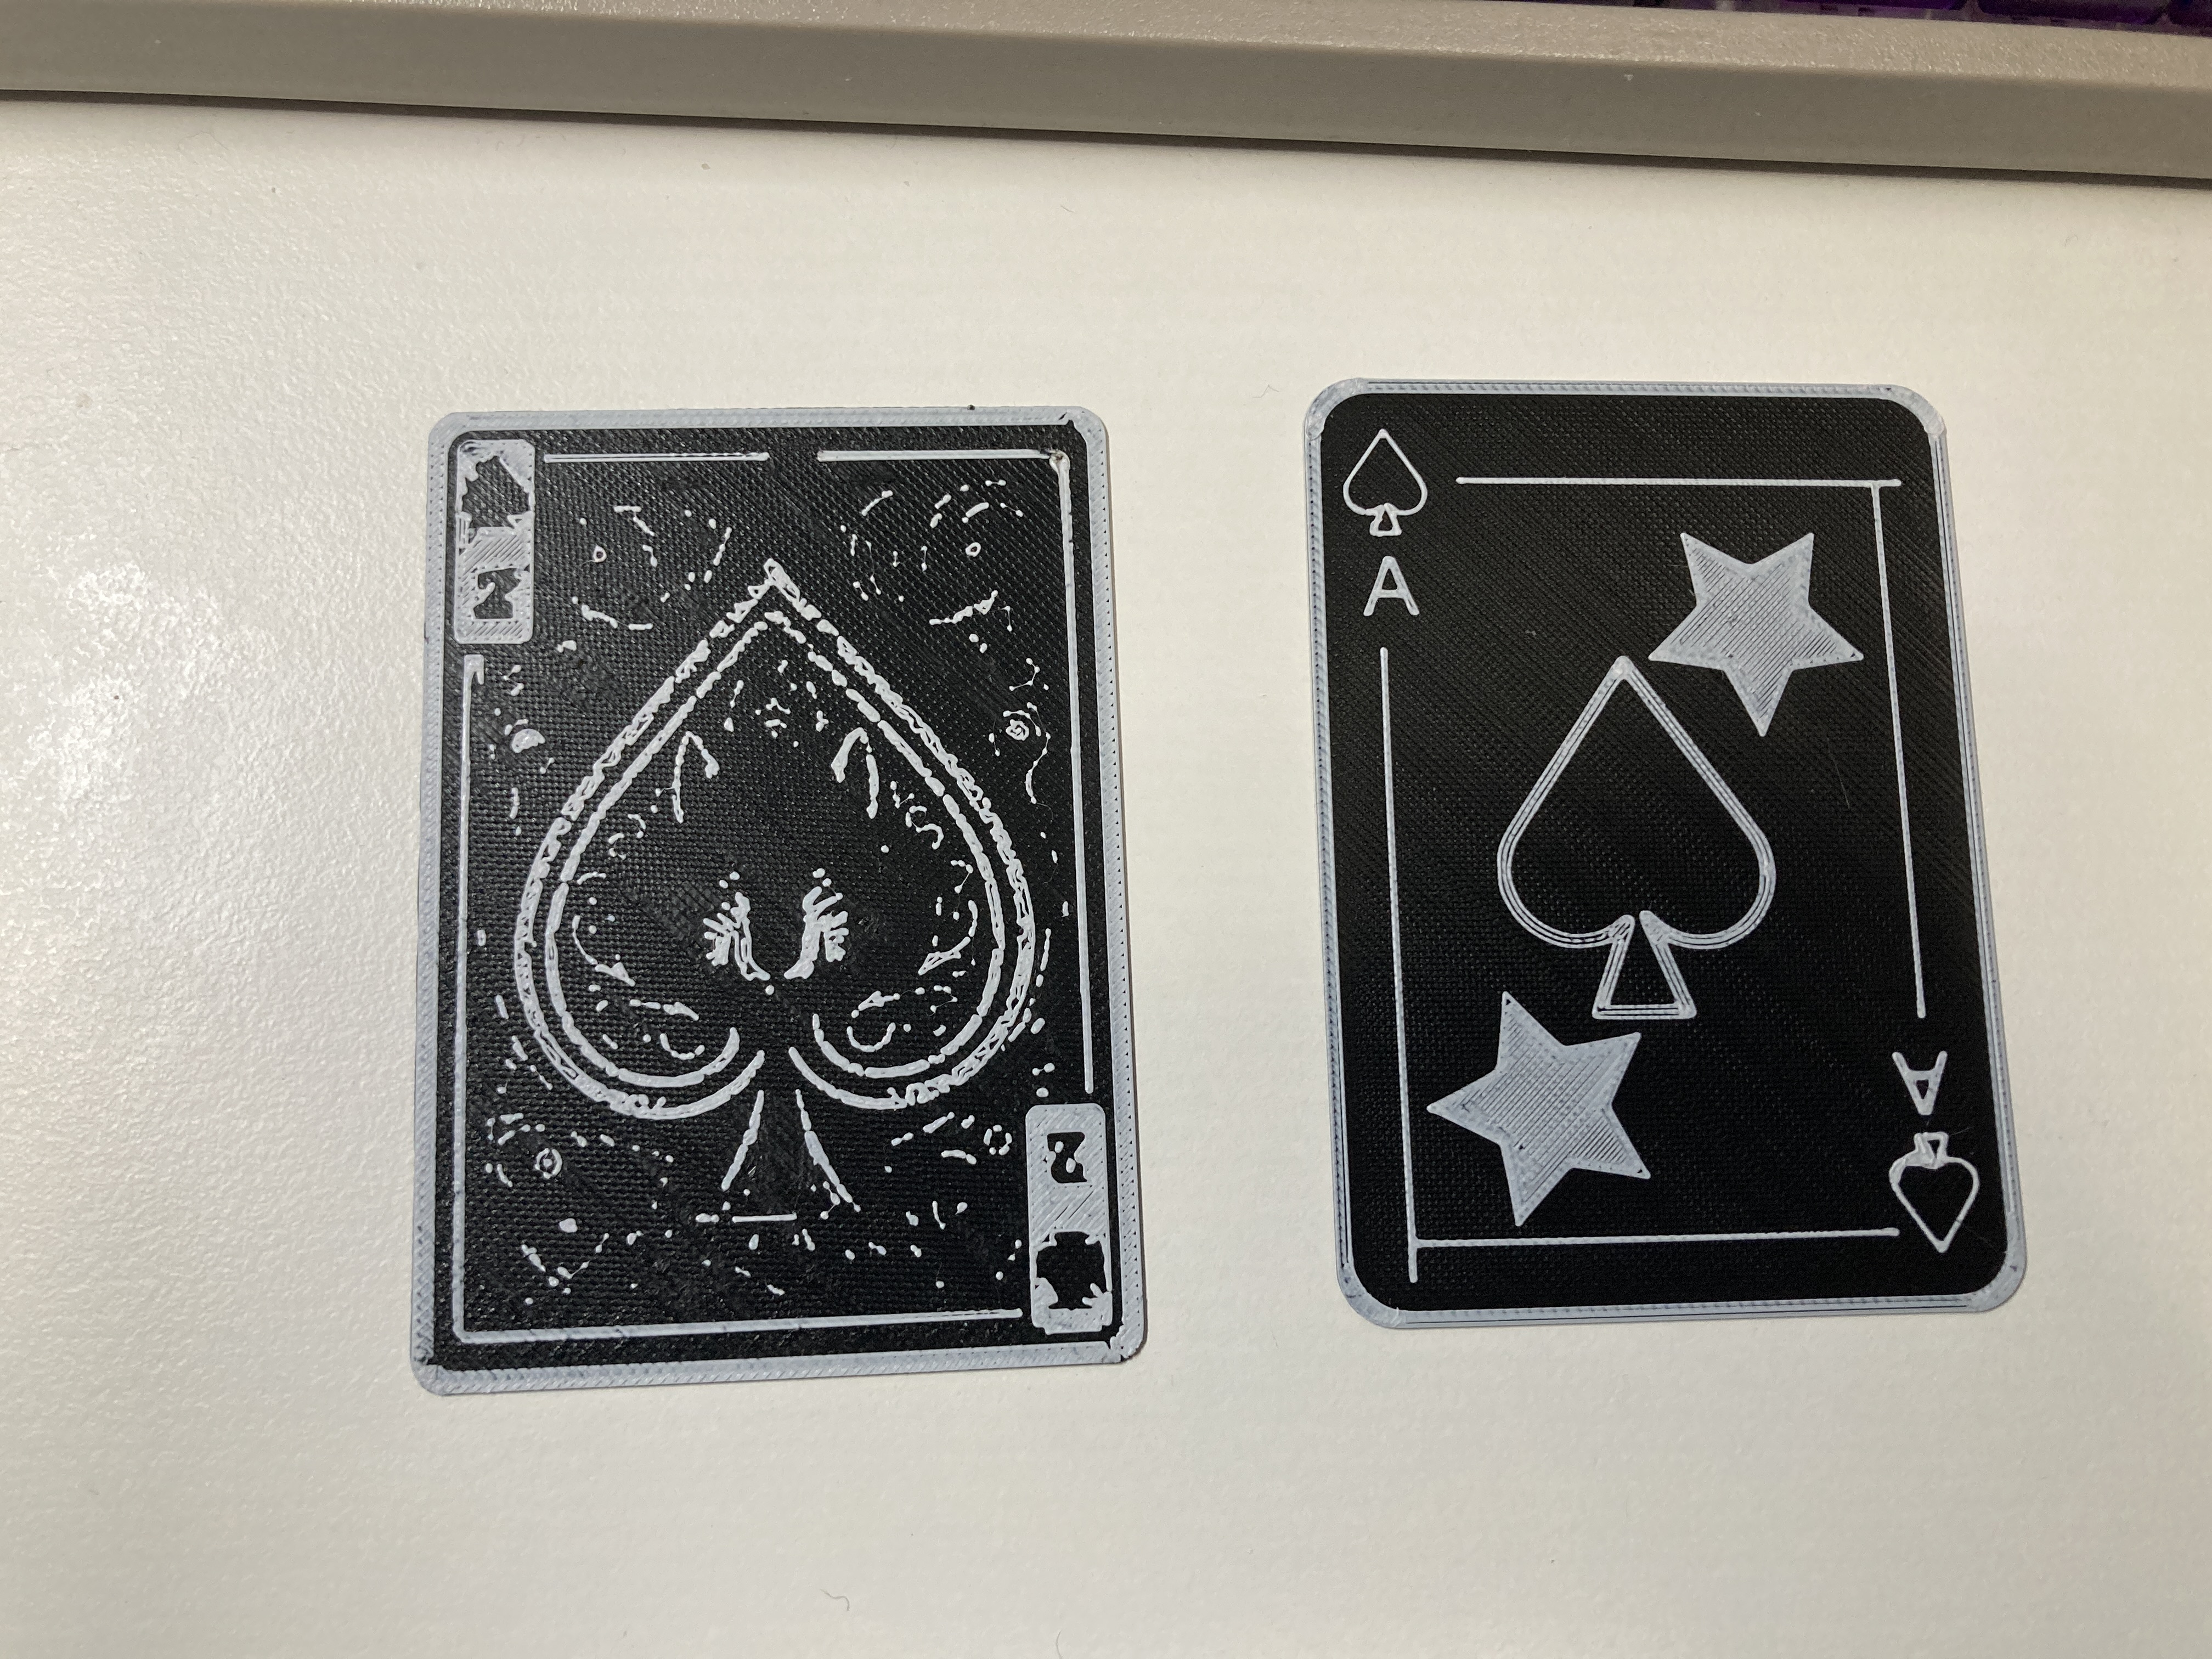
i tried it with one of the cards from the set, and it… didn't work. i even changed stuff around so i was printing with a 0.2mm nozzle so i could get as many of the "color" layers laid down as i could. but when you take a color specific print and take out the colors, they all just want to print in one go and ignore details and they get enveloped in the surrounding areas. so i got this as a result:
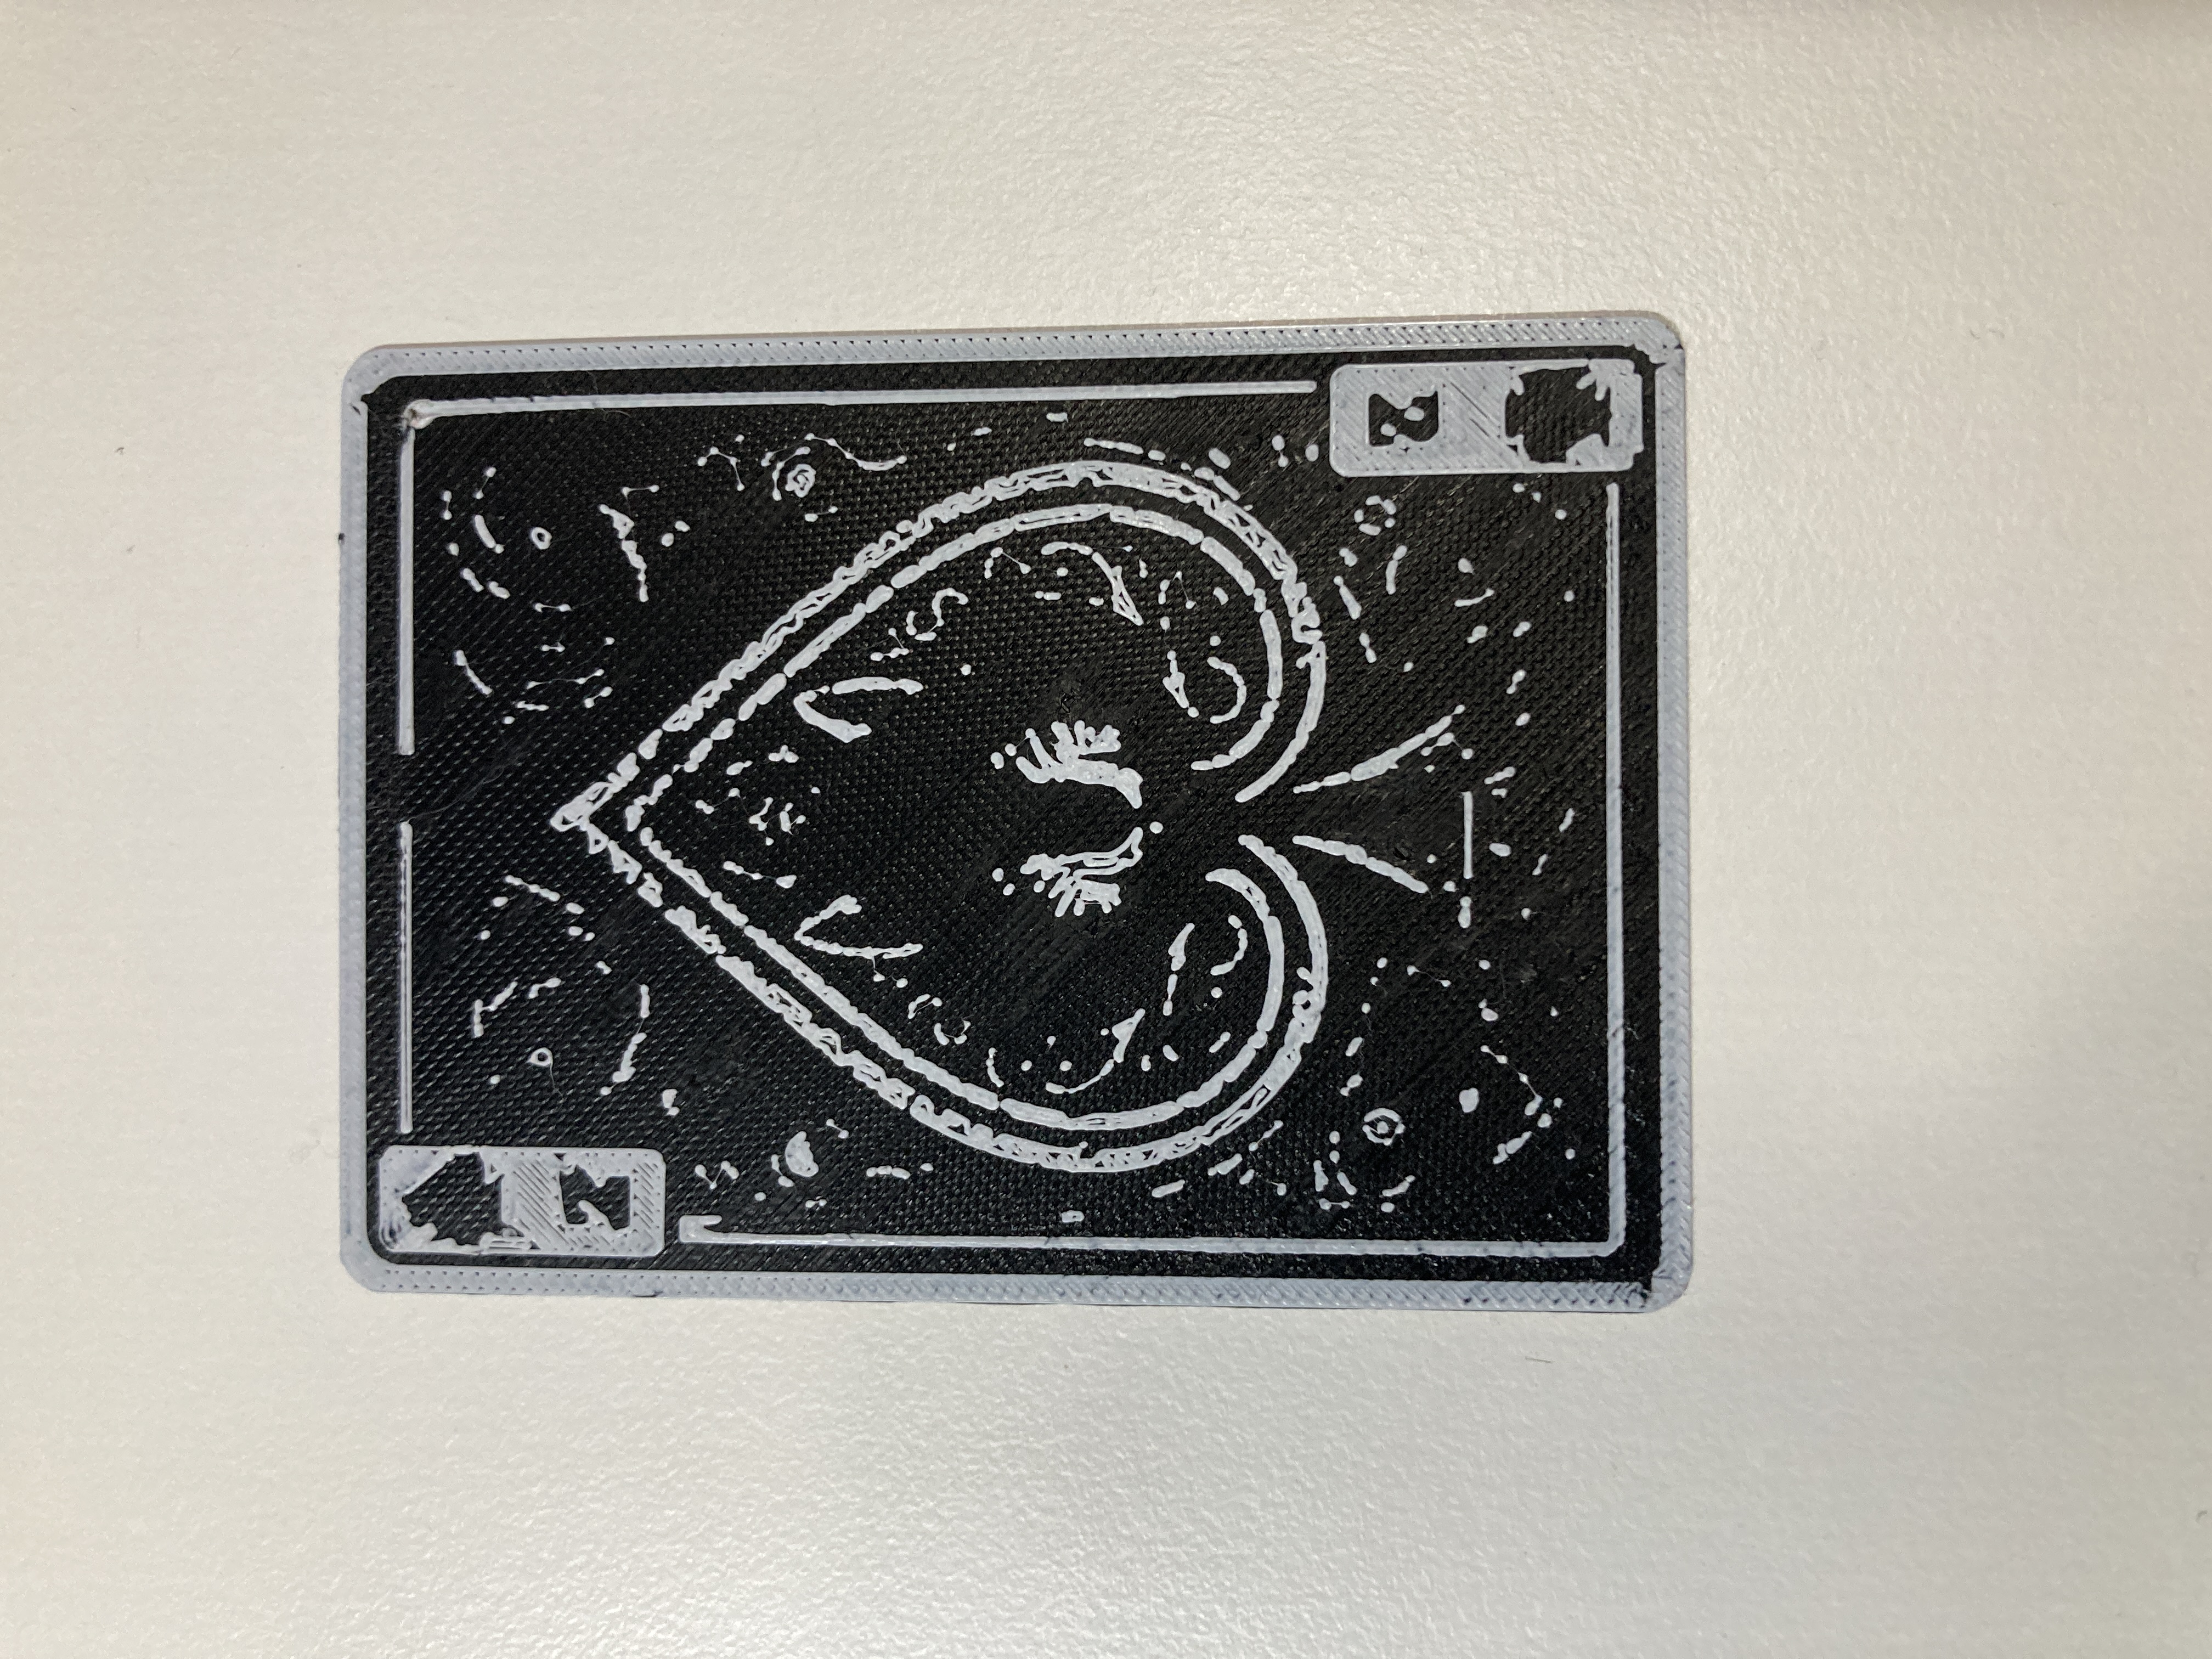
with this as the card that it was trying to print:
subpar result. but it did prove that i was right, if i just created a model that was at a specific layer height above the base, paused the print, changed the filament, and let it finish, then it would work!
making my own model
so the magic was in the layers, that would be easy to figure out and model. the game plan then became make a card base model, then get all the card "content" as models and then make… 52 card models lol.
i made up a really shitty ace design, threw it in a png to stl program. that was the easy part. i made a card base model in tinkercad. i love tinkercad. its babbys first 3D modeling software but i haven't yet wrapped my head around blender just yet, and tinkercad does everything i need it to for the modeling i do so far, which is usually just 3d printing related.
my card model is 63.5mm x 88.9mm (or 2.5in x 3.5in) which is about a standard card size. there's slight variation in certain types of cards but so long as my cards are uniform then it doesn't really matter.
the thickness of the card is what i really had to mess with, a magic card is about 0.3mm thick, and the 3d printed playing card i think was around 0.36mm thick. i made printing tests with 0.2, 0.3, and 0.5mm thick cards. i was printing all of these with a 0.08mm layer height so i could be certain i was controlling what existed on what layer if i changed what height it went to on the card.
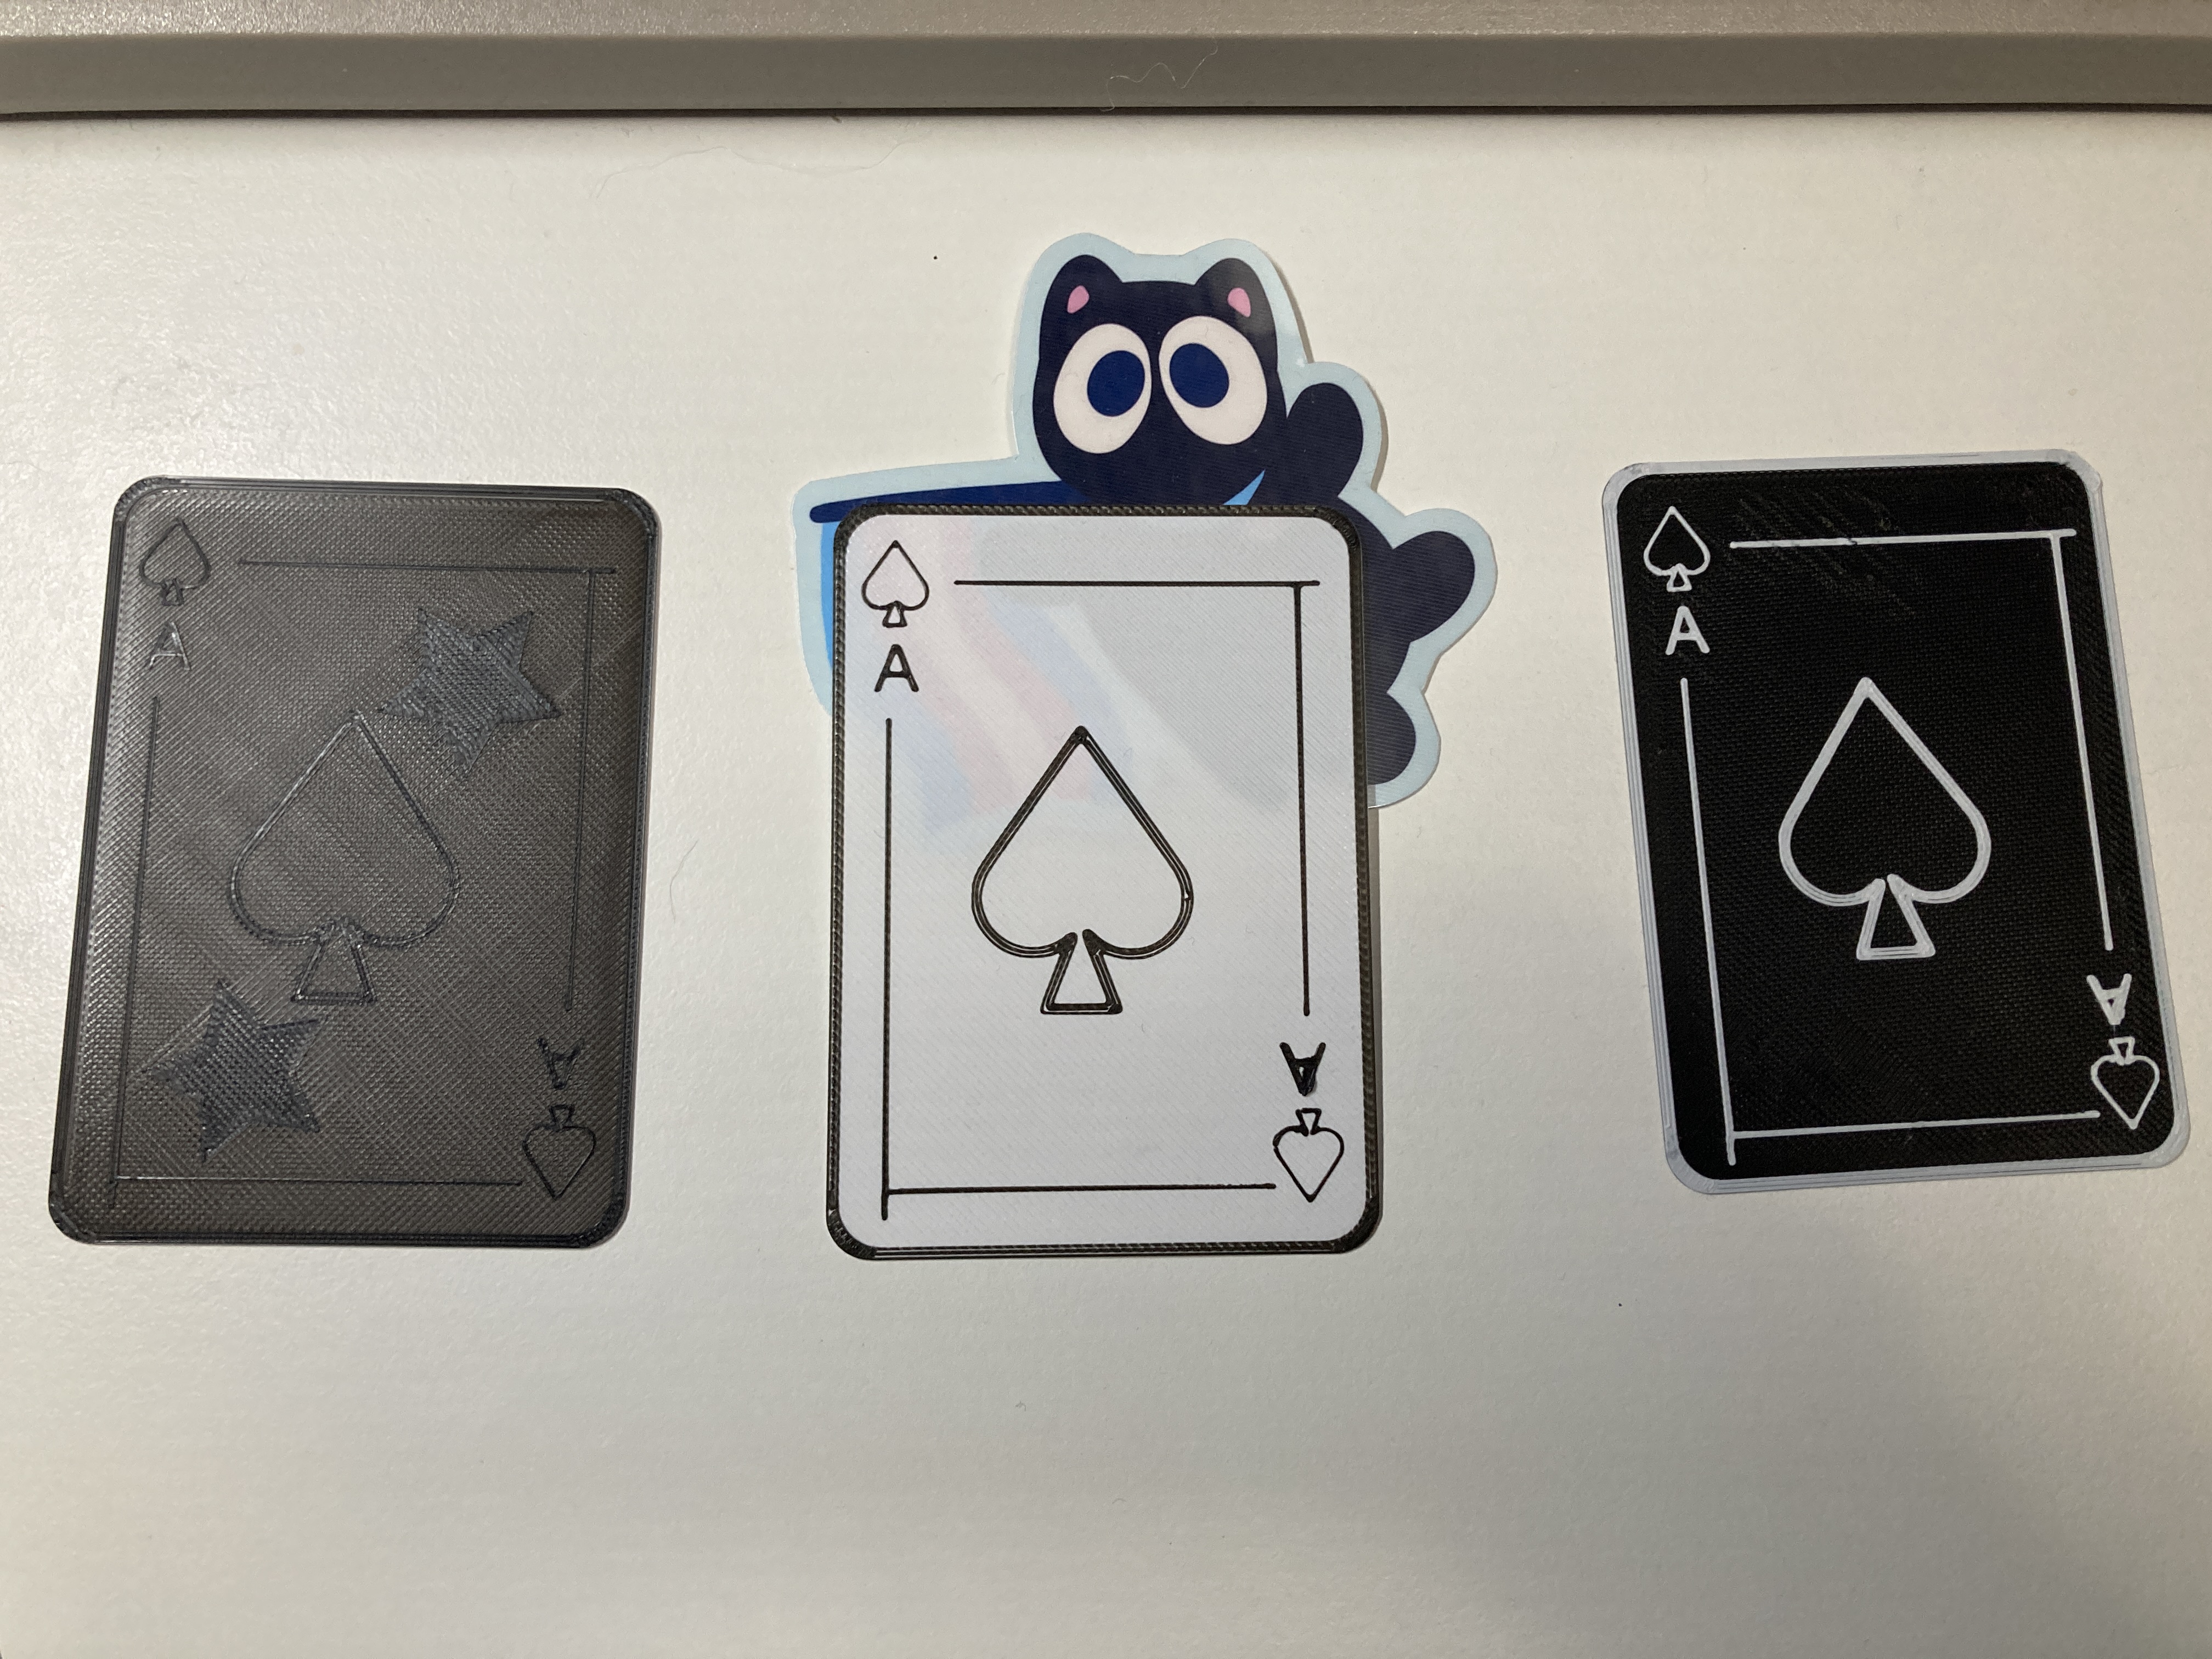
in this photo, my tests are ordered the 0.5, 0.2, and 0.3. the 0.2mm with white filament ended up being too transparent, which i used the sticker underneath to demonstrate. printing the base layer with black filament would make it much more opaque, though because its plastic put down in layers, if you hold them up to a lamp the "printing" could be seen. just don't play with these if you have a lamp for a head i guess?
but the other two tests revealed that 0.5mm is a bit too thick (i also messed up and didn't change what layer it paused at so it is dark, but it is a single black layer on top of a white base which makes it a little grey which is a nice effect to note). 0.3mm was ok but felt a little thin yet.
i tried again at 0.4mm (i was kind of circling around this number since that first card was 0.36mm) and that turned out to be the best and felt the most like that first one in stiffness.
i also tried printing on my special build plate that gives a starry texture on the backside of whatever is printed, but one of the tests fucked up in a way i don't even know how it messed up and ripped a hole in one side of the build plate… luckily the plate is double sided but that happened when i was still trying to use my 0.2mm nozzle.
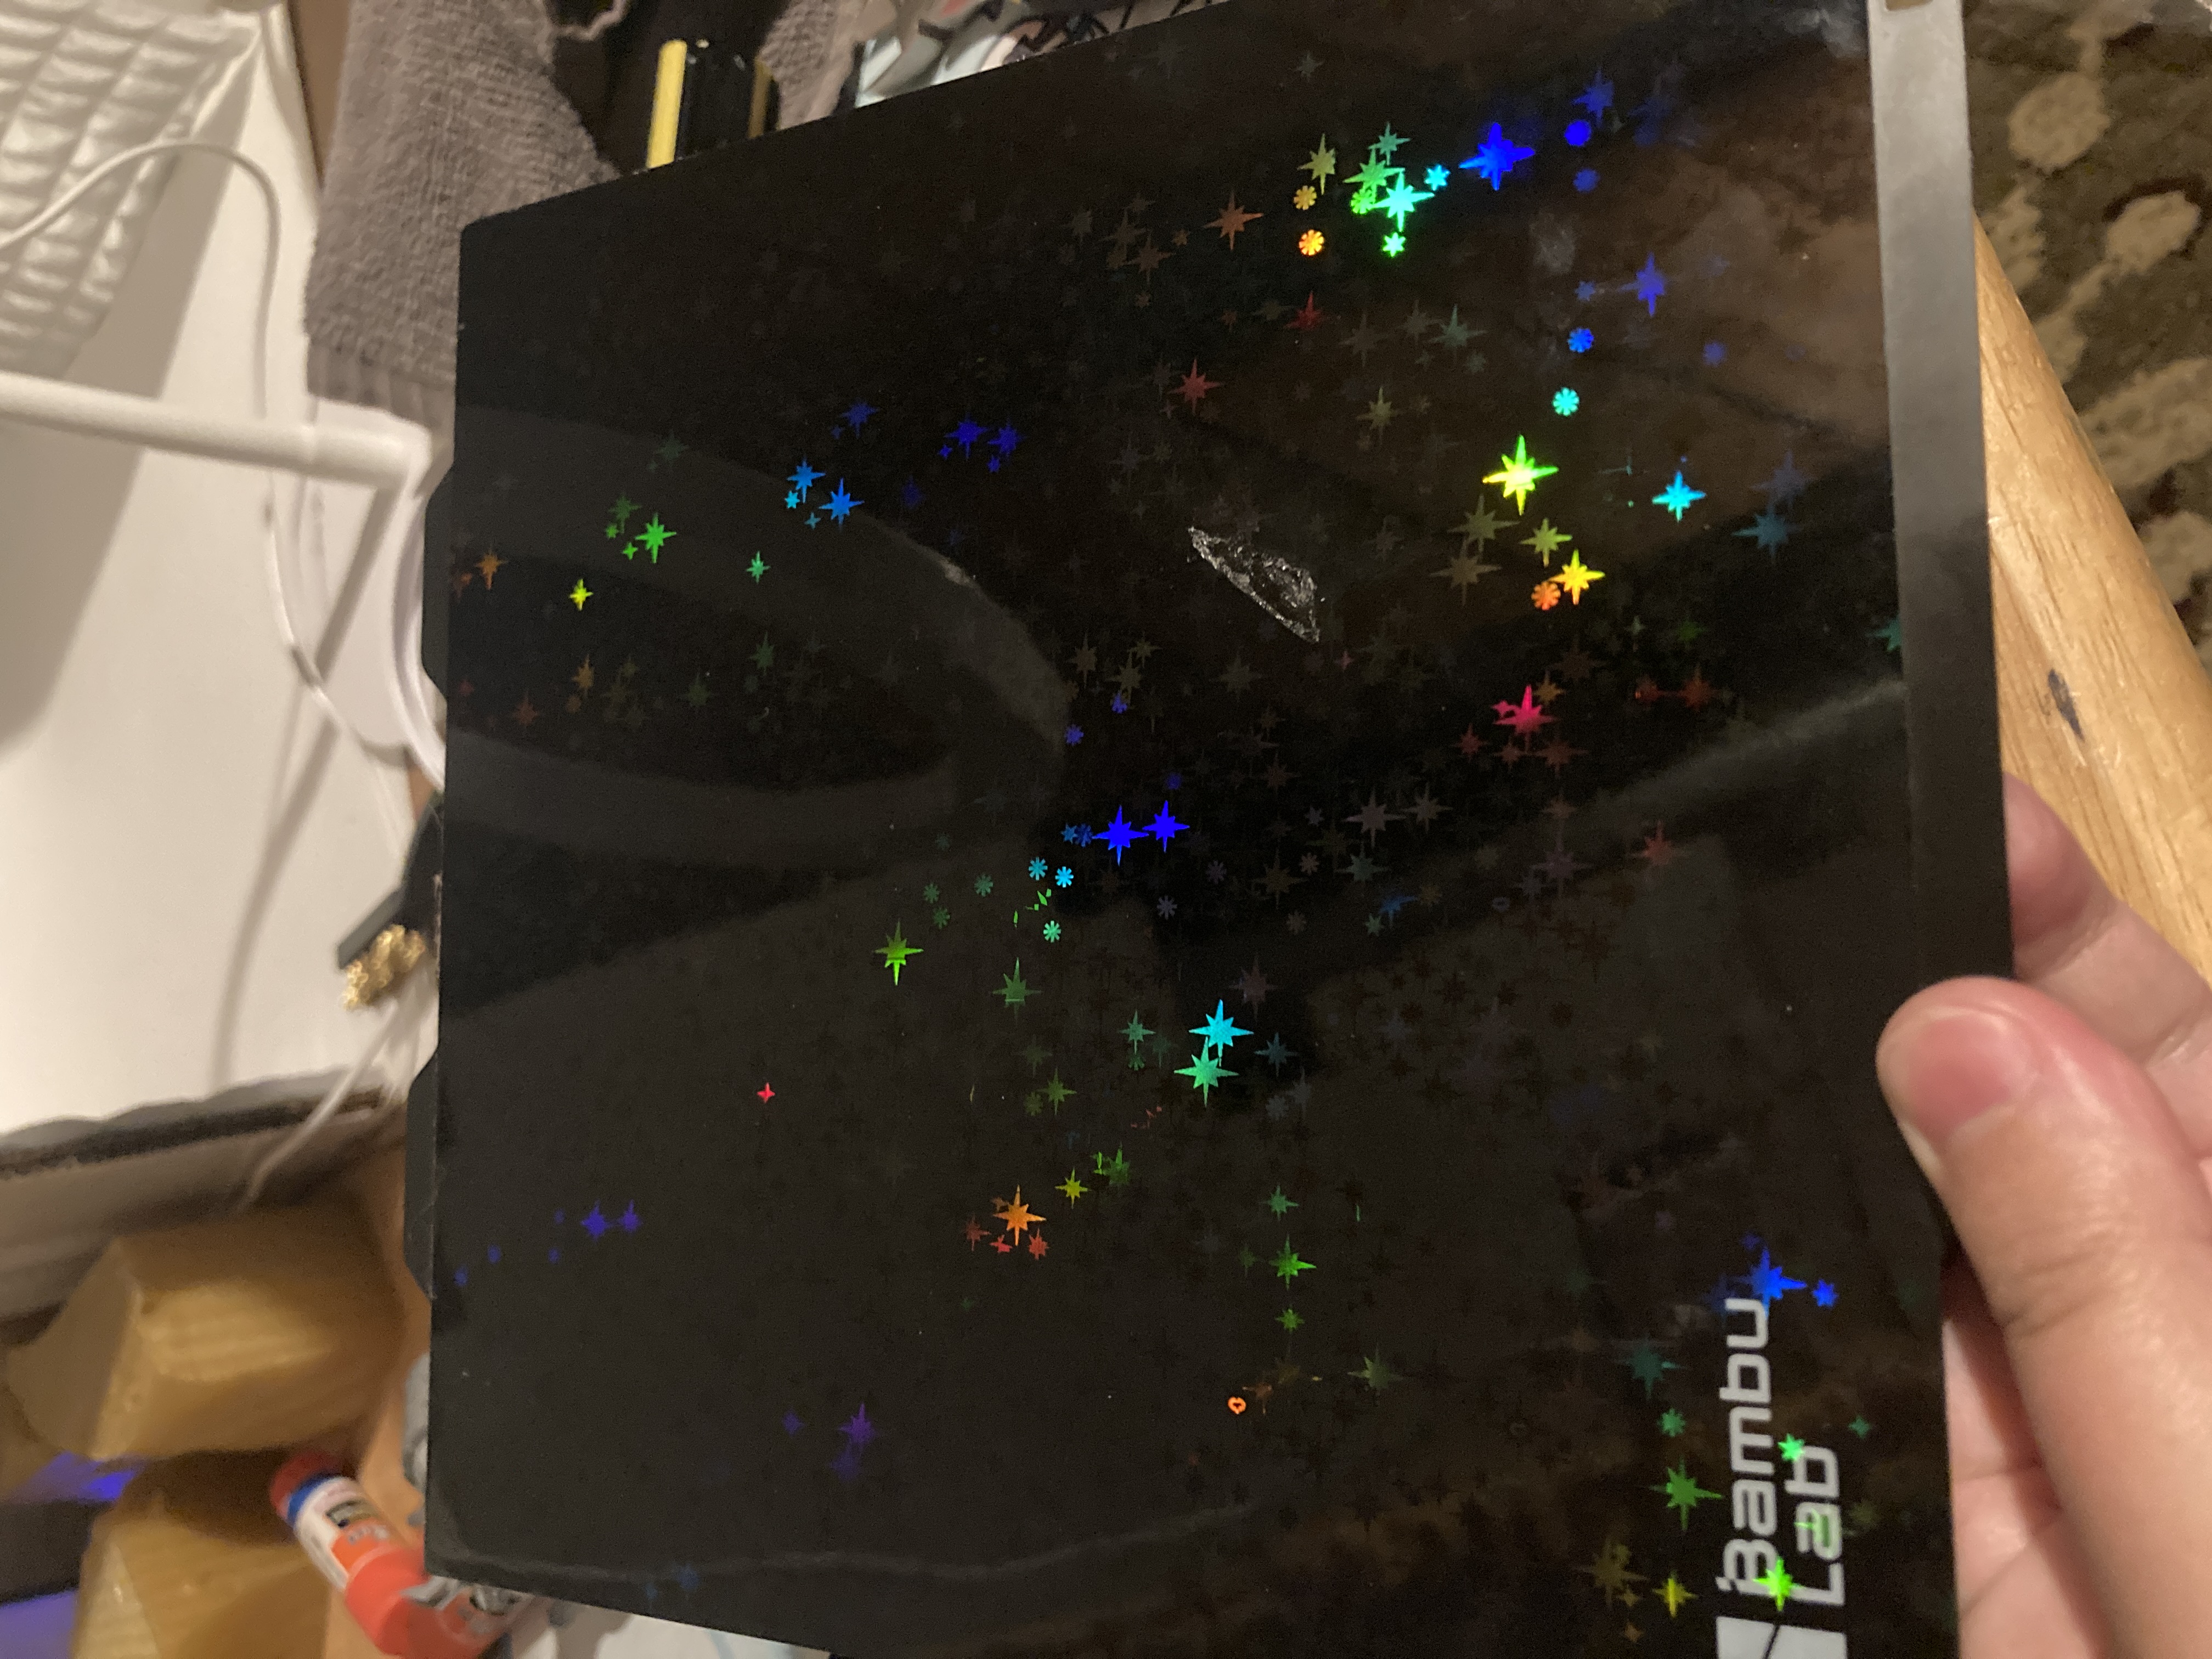
my poor build plate…
i switched to the 0.4mm nozzle after that and haven't had any problems since then. all these prints are still just as capable with the 0.4mm nozzle.
the card designs
now that i had the perfect layer height, i had to start making the other cards. the number cards were easy, they are usually only just one color so i could use red filament for the red cards and white filament for the black cards. the face cards though… that became a bit of a question.
i tried messing around with the standard french playing card faces:
i tried to extract as much detail as i could out of the design, which i managed by rendering the card in pure binary black and white, making it an svg, and then making that svg an stl. (thats a simplified version of the process, it was much more annoying until i realized tinkercad lets you just import svgs and it turns them into 3d models)
the problem with this method though is that there is a massive loss of detail in both directions depending on how much is captured in the svg. do i let the face be very defined and the bodies lose detail? or do i let the face lose detail and the bodies have more design?
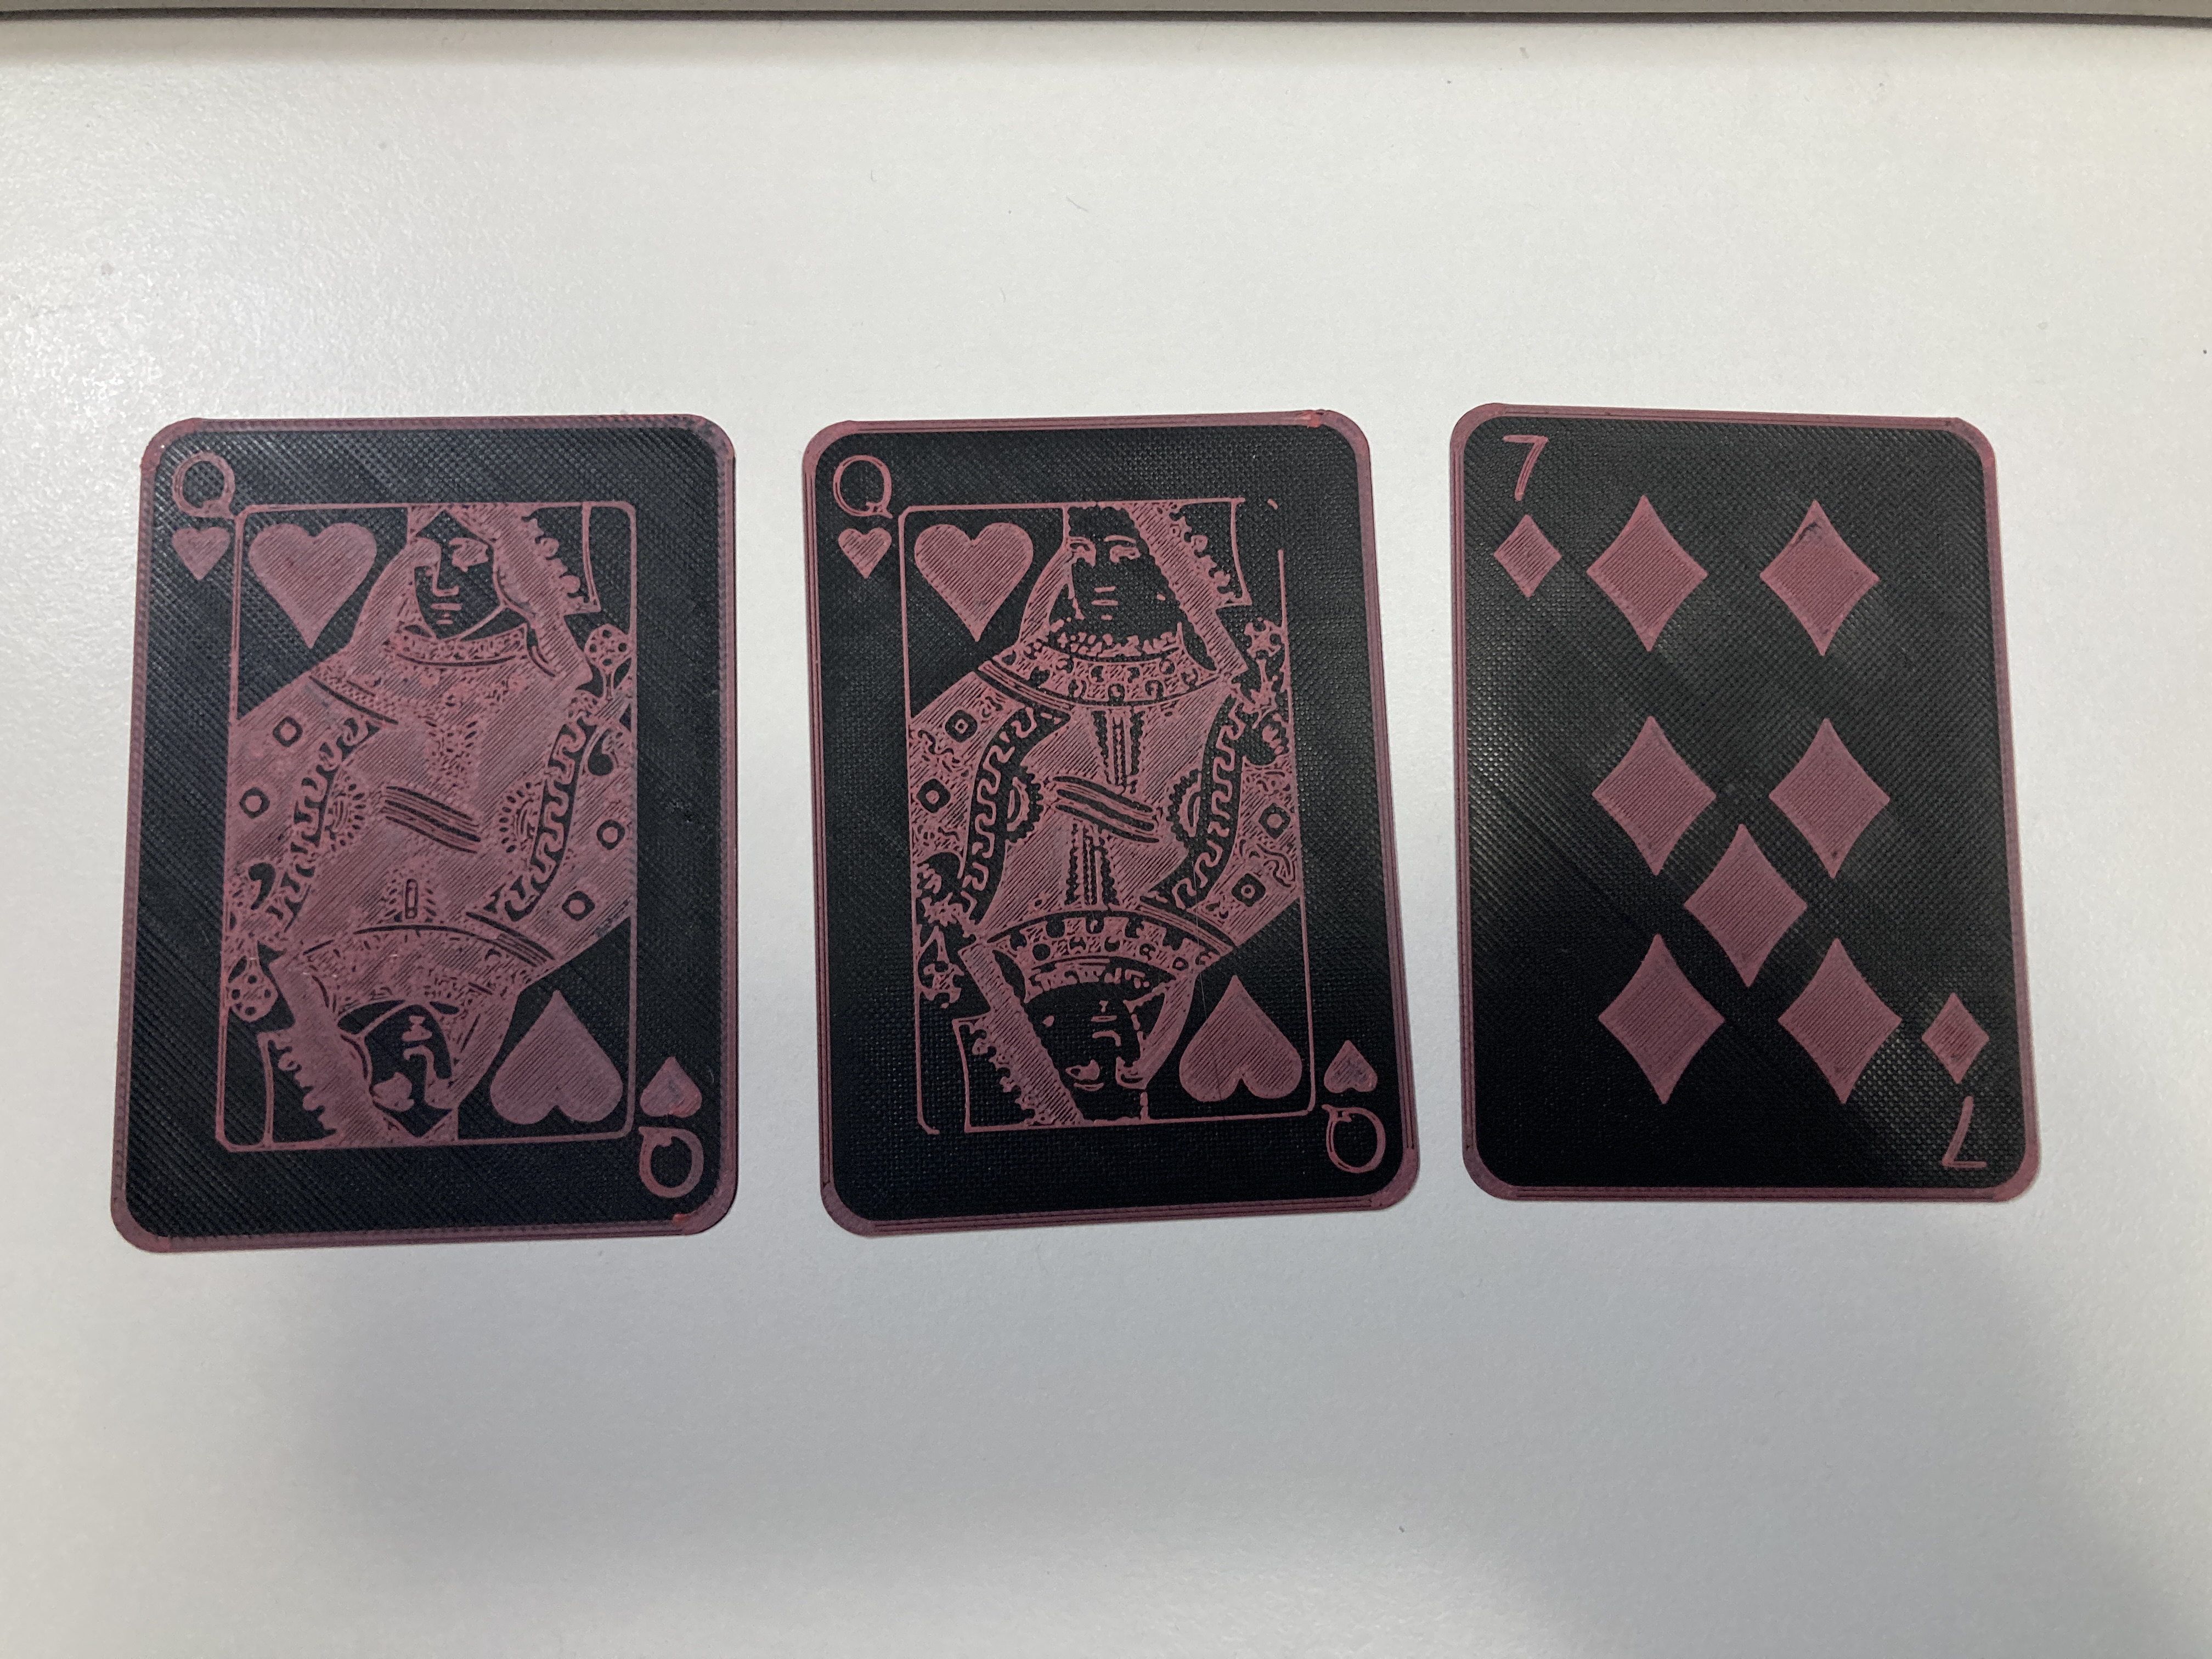
i wasn't really happy with either of these results, it was really impressive how much detail i could capture, but i was using a png converted to an svg which caused a detail loss problem. i should've just found an svg in the first place.
so i went and found svgs in the first place. wikimedia commons has a bunch of public domain/CC0 license playing card files. they have a bunch of classic ones and ones that people have uploaded for the specific purpose of being public domain.
i wanted to work with a single color file as much as i could, and thankfully there's this collection by someone named "ToasterCoder". so i edited all the svgs to knock out the background and border, imported them all into tinkercad, put them on my card base, export them, and now i have my cards to print!
"but what about the card backing?" i hear you ask.
i don't think it's gonna work for these types of cards. i don't even think the original set i took inspiration from for this project had cards backs.
for the record i did consider finding a way to do a backing, but we're working with really think layers of plastic here. i would have to add an extra layer so that the opacity wasn't a problem so the cards would be getting even thicker
i also considered making some kind of sticker to put on the back but that'd also increase the height of the card and i'd have to place them all by hand which could lead to them being identifiable.
while my special build plate could be used to make a backing, it also almost got ruined by a previous attempt, and the sparkles disappear when it gets full of fingerprints, and there are minor imperfections in the build plate that keep getting captured in the back of the card because its smooth.
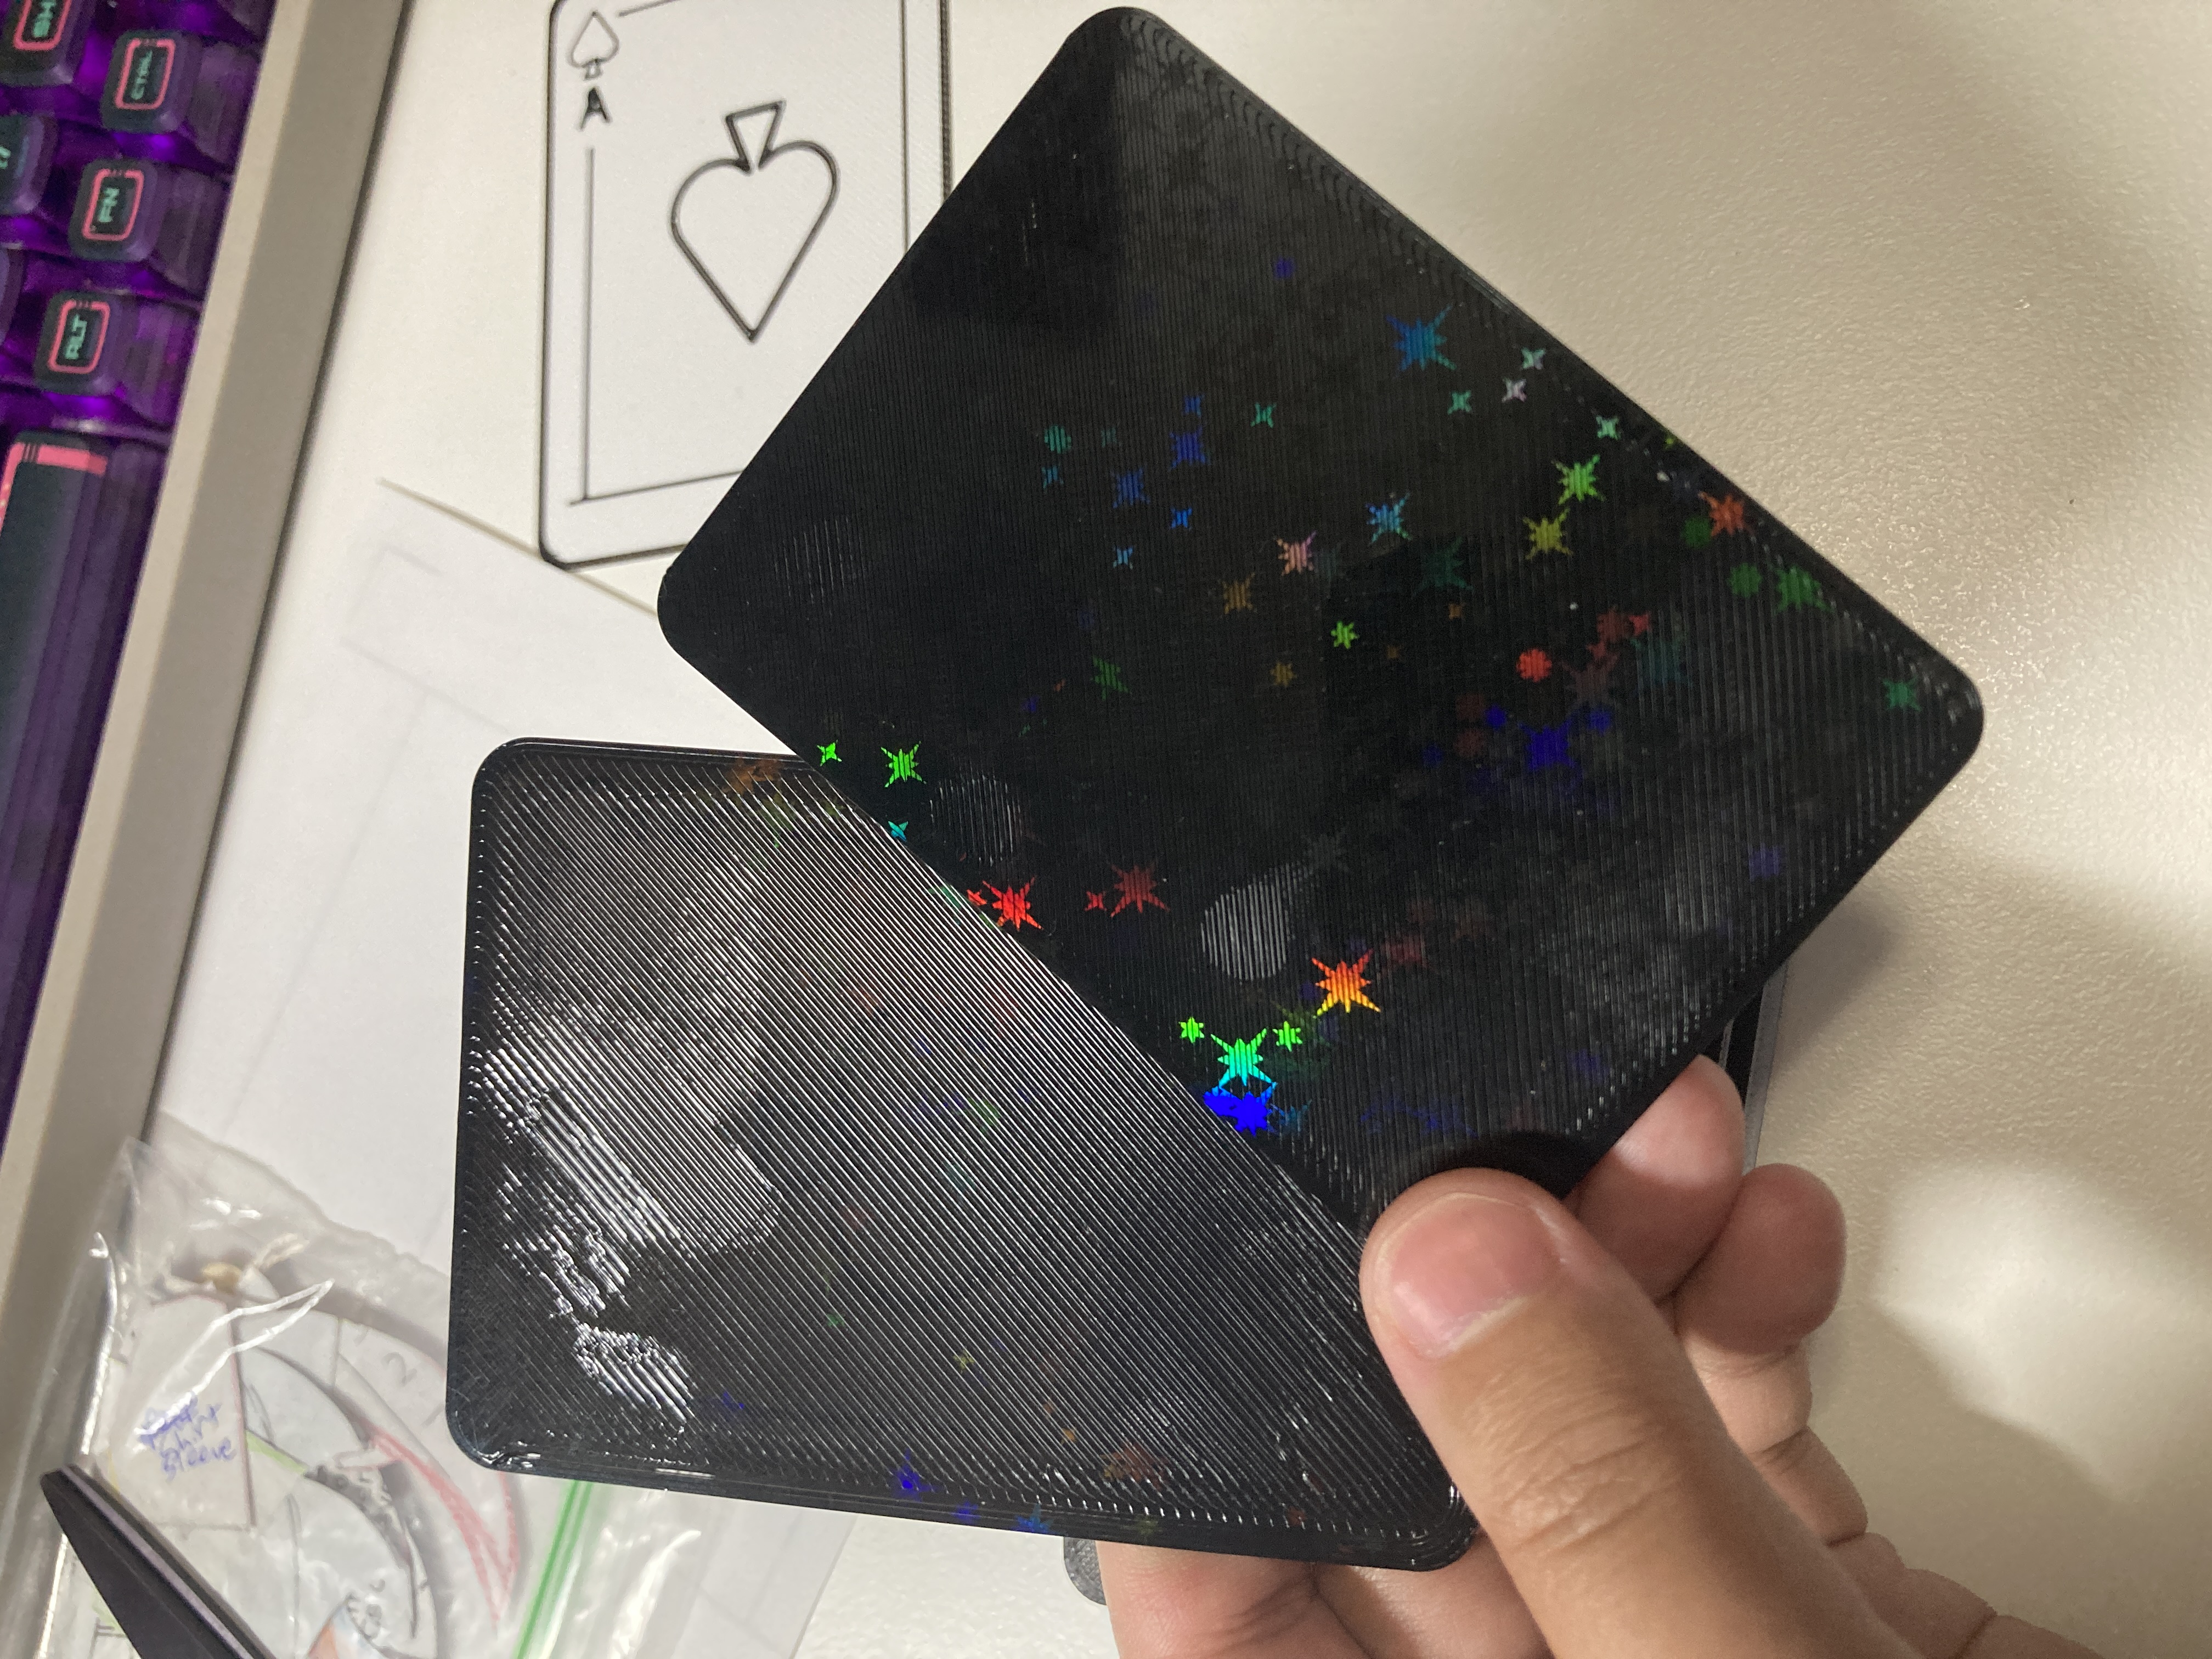
both of these were printed on that sparkly build plate, but the left one i had been handling for a bit so the sparkly stuff wasn't as visible. additionally you can already see that circle surface imperfection on the right one.
using the textured build plate with a specific bottom surface infill pattern is the best i can do for the moment. the octagram spiral is probably the most "card-like" back that is present.
realizing things about the model
while i was putting together the card models and waiting for more tests to print, i was playing around with the tests i already had printed and i realized something. the nice border i made would work against me if i used different color filaments. you can see where there's a white or red card in the stack if you look at the edge of the card.
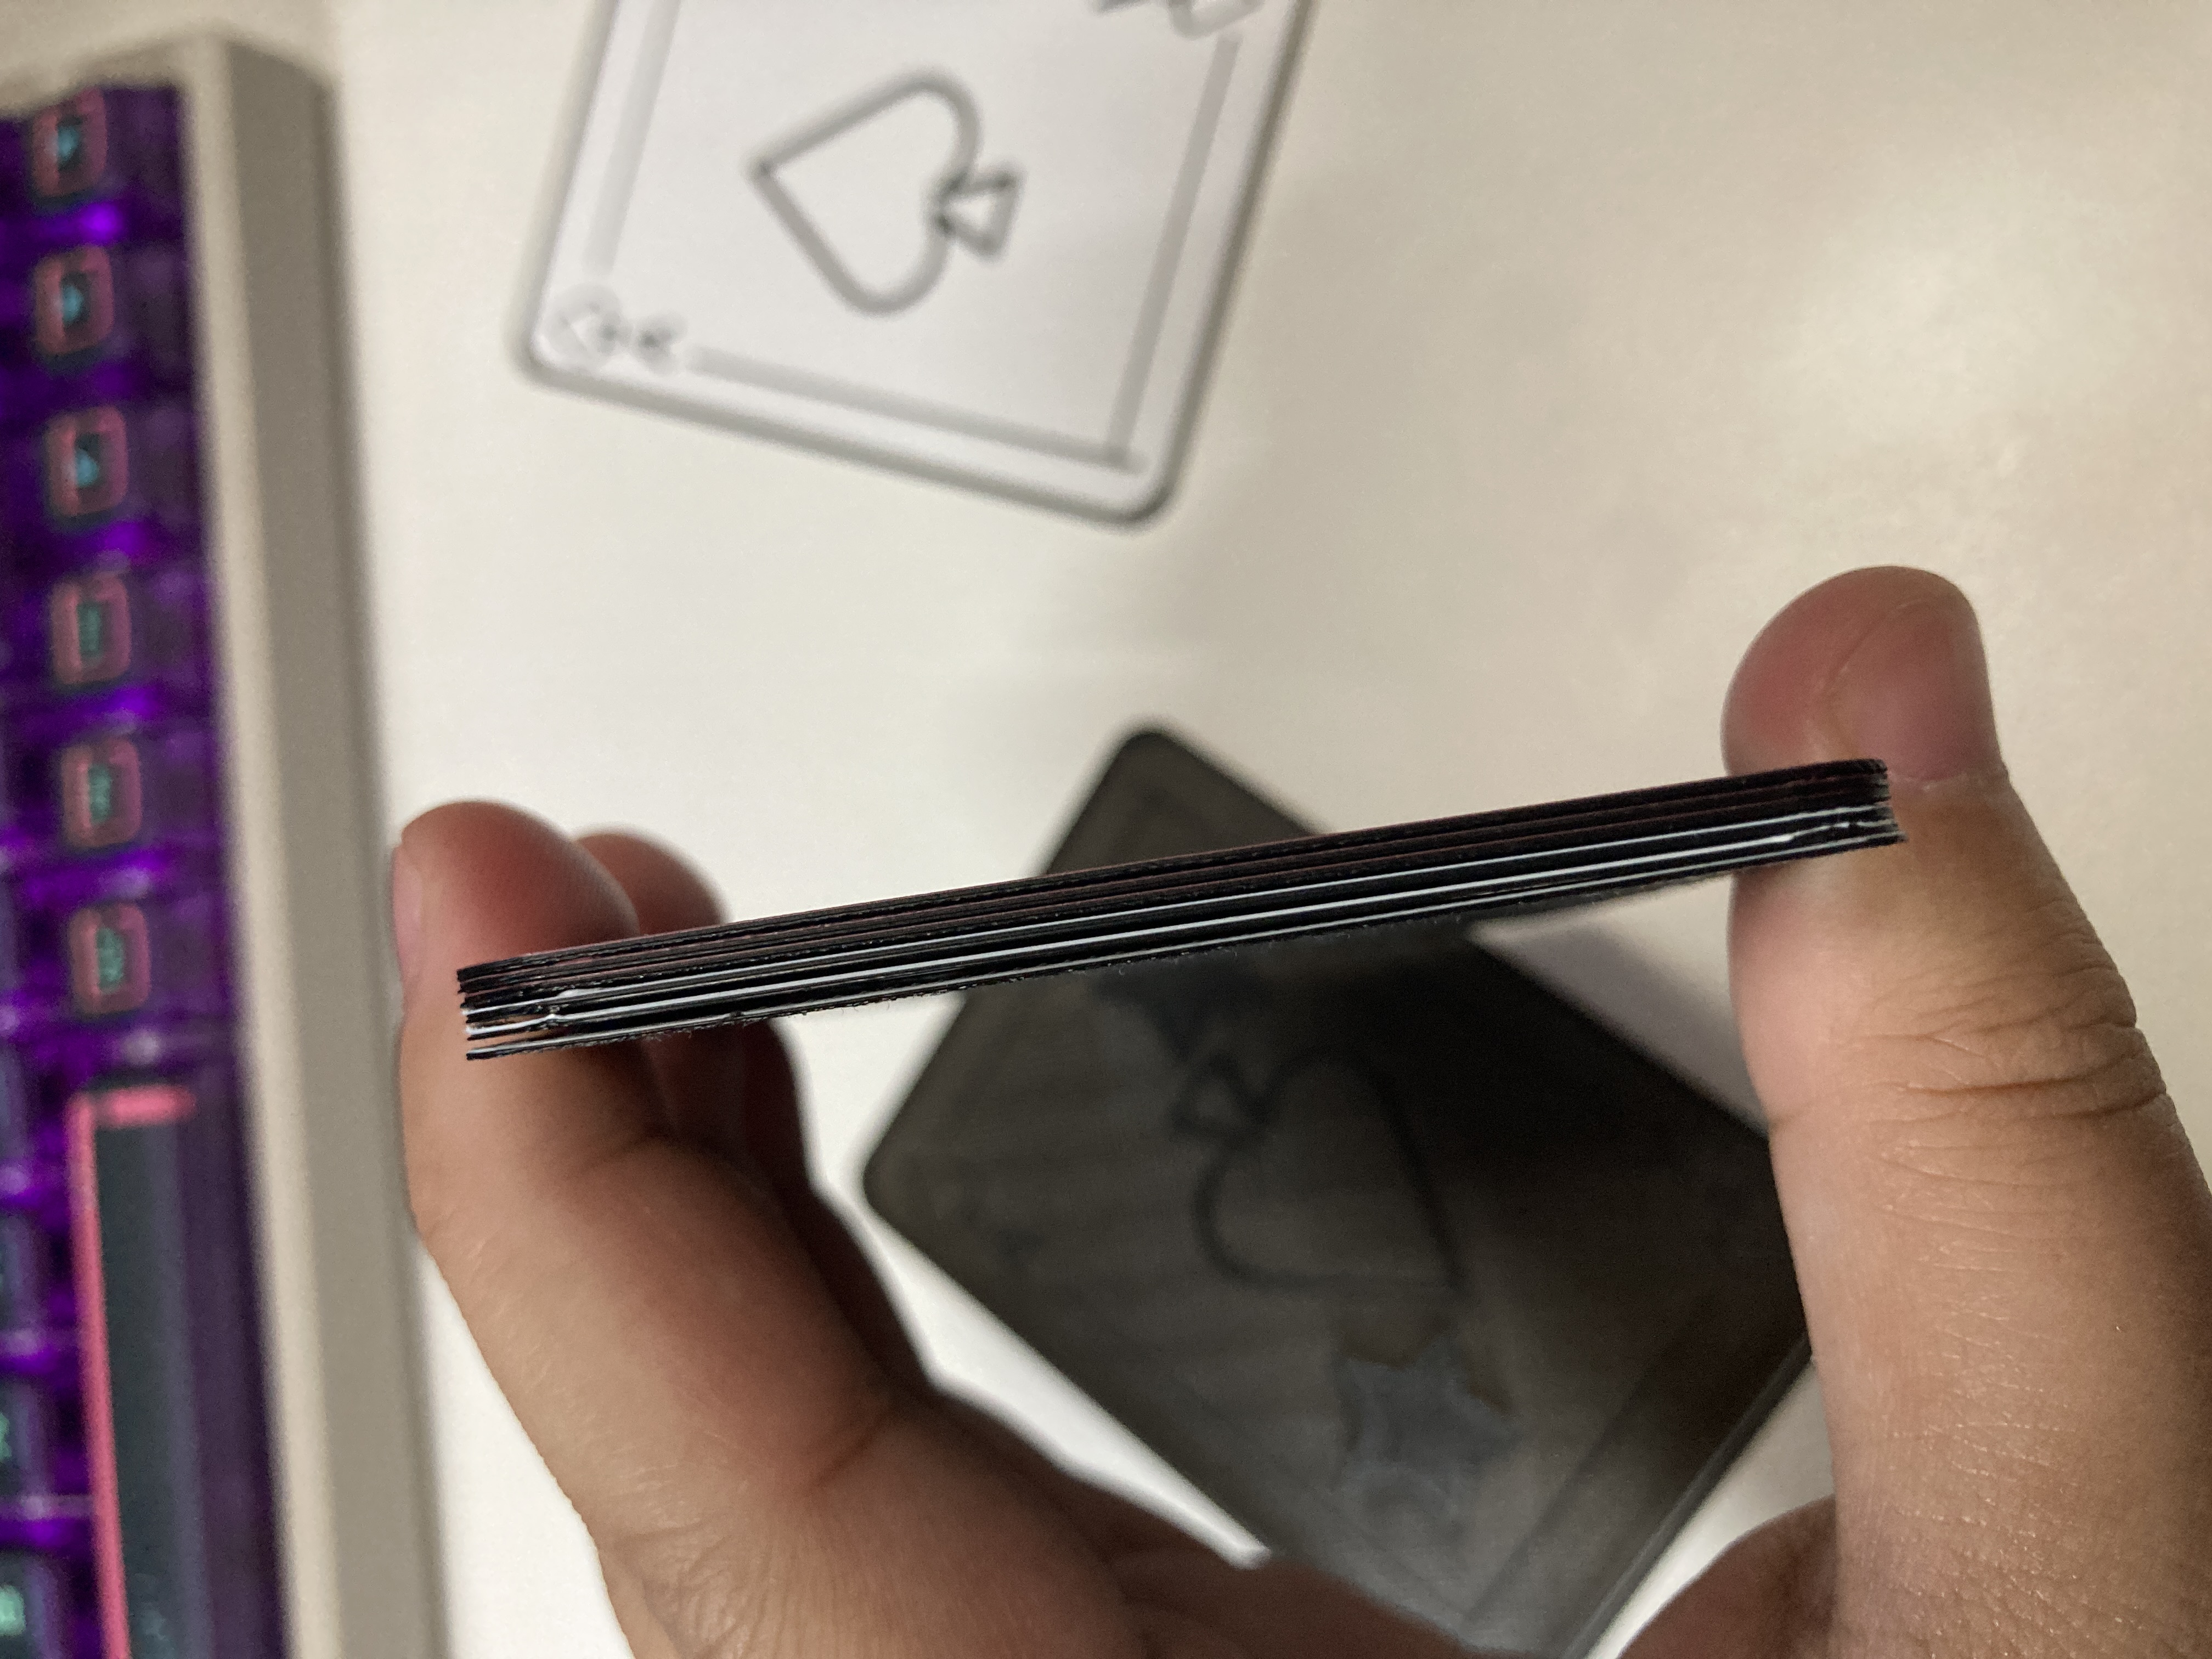
to be valid as actual playing cards, this wasn't gonna fly. i had to change the model again.
luckily i had barely gotten into making the final cards so i easily could go back and adjust the model. another thing to learn from these test prints revealed that with the octagram spiral on the back it made the card too flimsy so i had to adjust the height again to a total of 0.5mm.
after 3 days of fuddling with this, i got some cards! i just had to print them all.
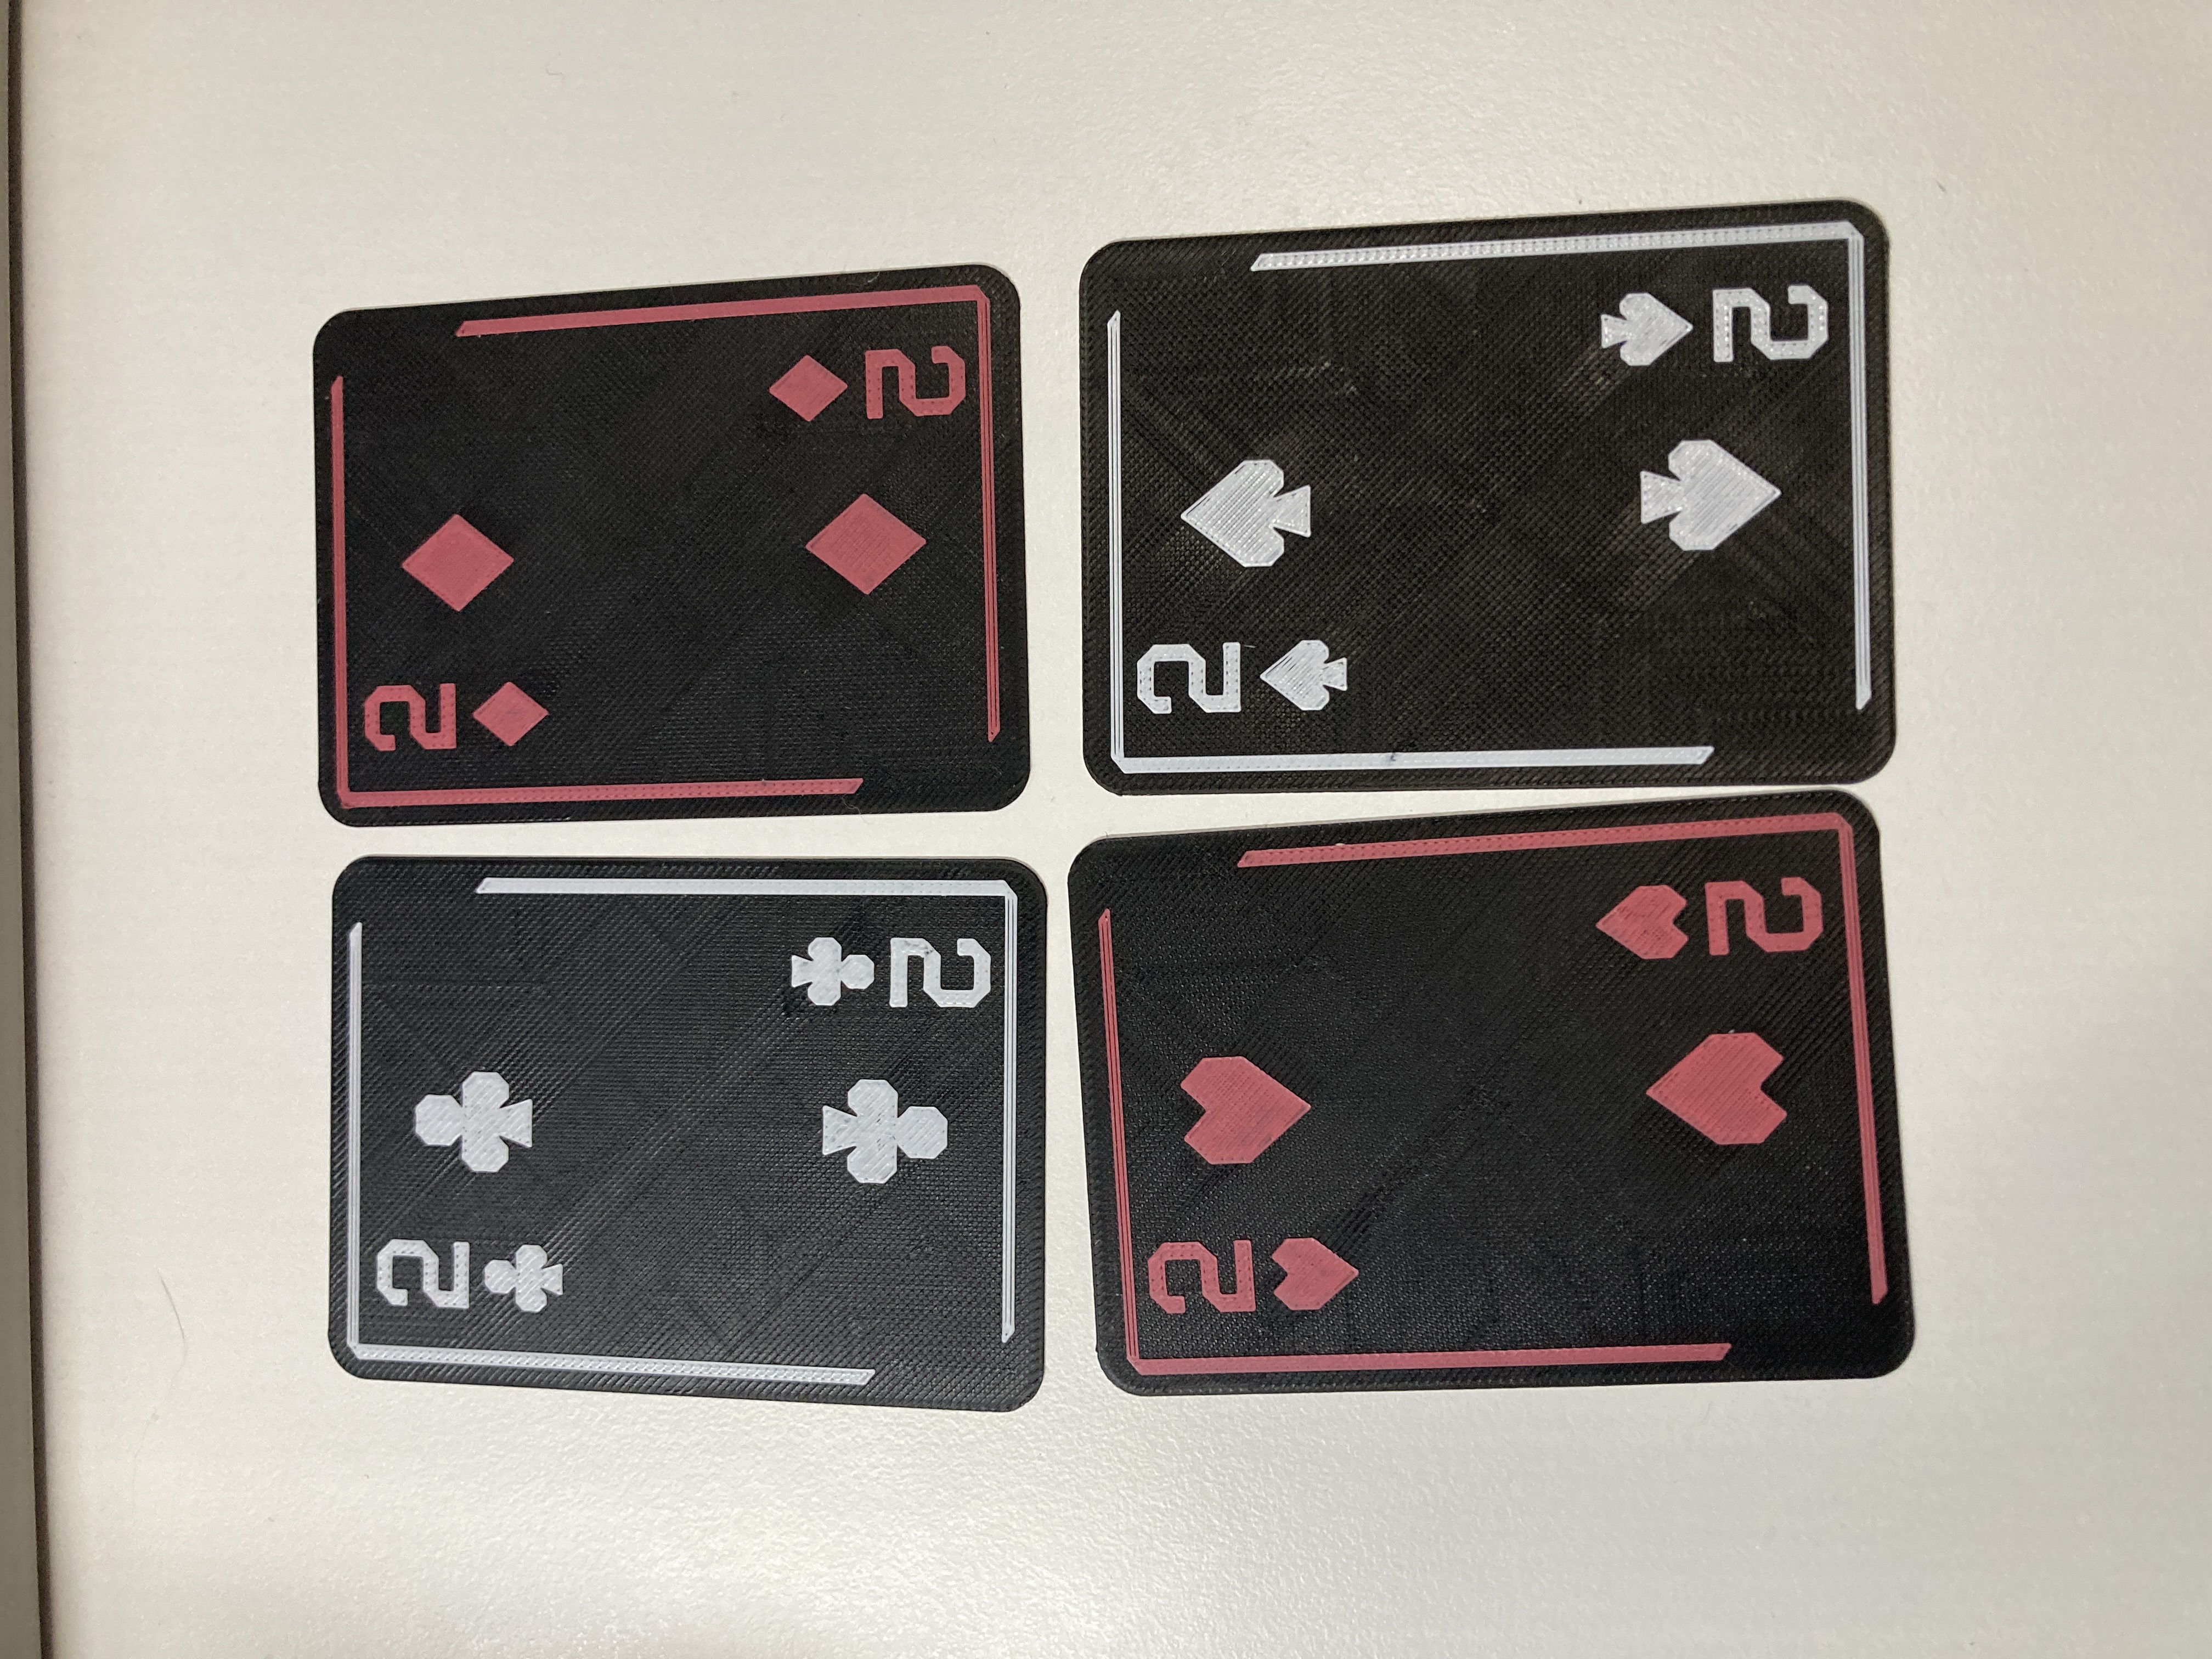
a print of 2 cards was about 25 minutes, 3 cards was about 35, and there was the time needed to replace the filament before it started printing layer 4. so for all 52 cards that was about 9-10 hours of printing, non consecutively but easily done over the course of a weekend. my build plate is small, i started with printing two cards at a time but i quickly fucked up removing a 3 card from the build plate so i moved up to doing 3 cards at a time and being diligent about tracking what cards i had and hadn't printed.
i wasn't keeping track of filament usage, but this print leans more base filament heavy, so if you want to do it yourself make sure you have enough of that color the most. that said, it still isn't a whole lot of filament usage per card overall.
this set of cards also didn't have a joker so i quickly made one based off of the other face cards. this set of cards was CC0, so i was free to do that.
i didn't feel like writing out "joker" so i just made the J from the Jack a lowercase j to differentiate it.
i had to have a box to hold all my new cards, and i didn't feel like making my own box. there's a lot of playing card boxes out there, and i picked this one off of thingiverse to hold my cards. i just made the model wider and it seems to be working just fine. for the record, i edited the 2deck_v2.stl model to have this scale if you just want a copy of that:
after a weekend of printing, my cards are all done!
the final shots!

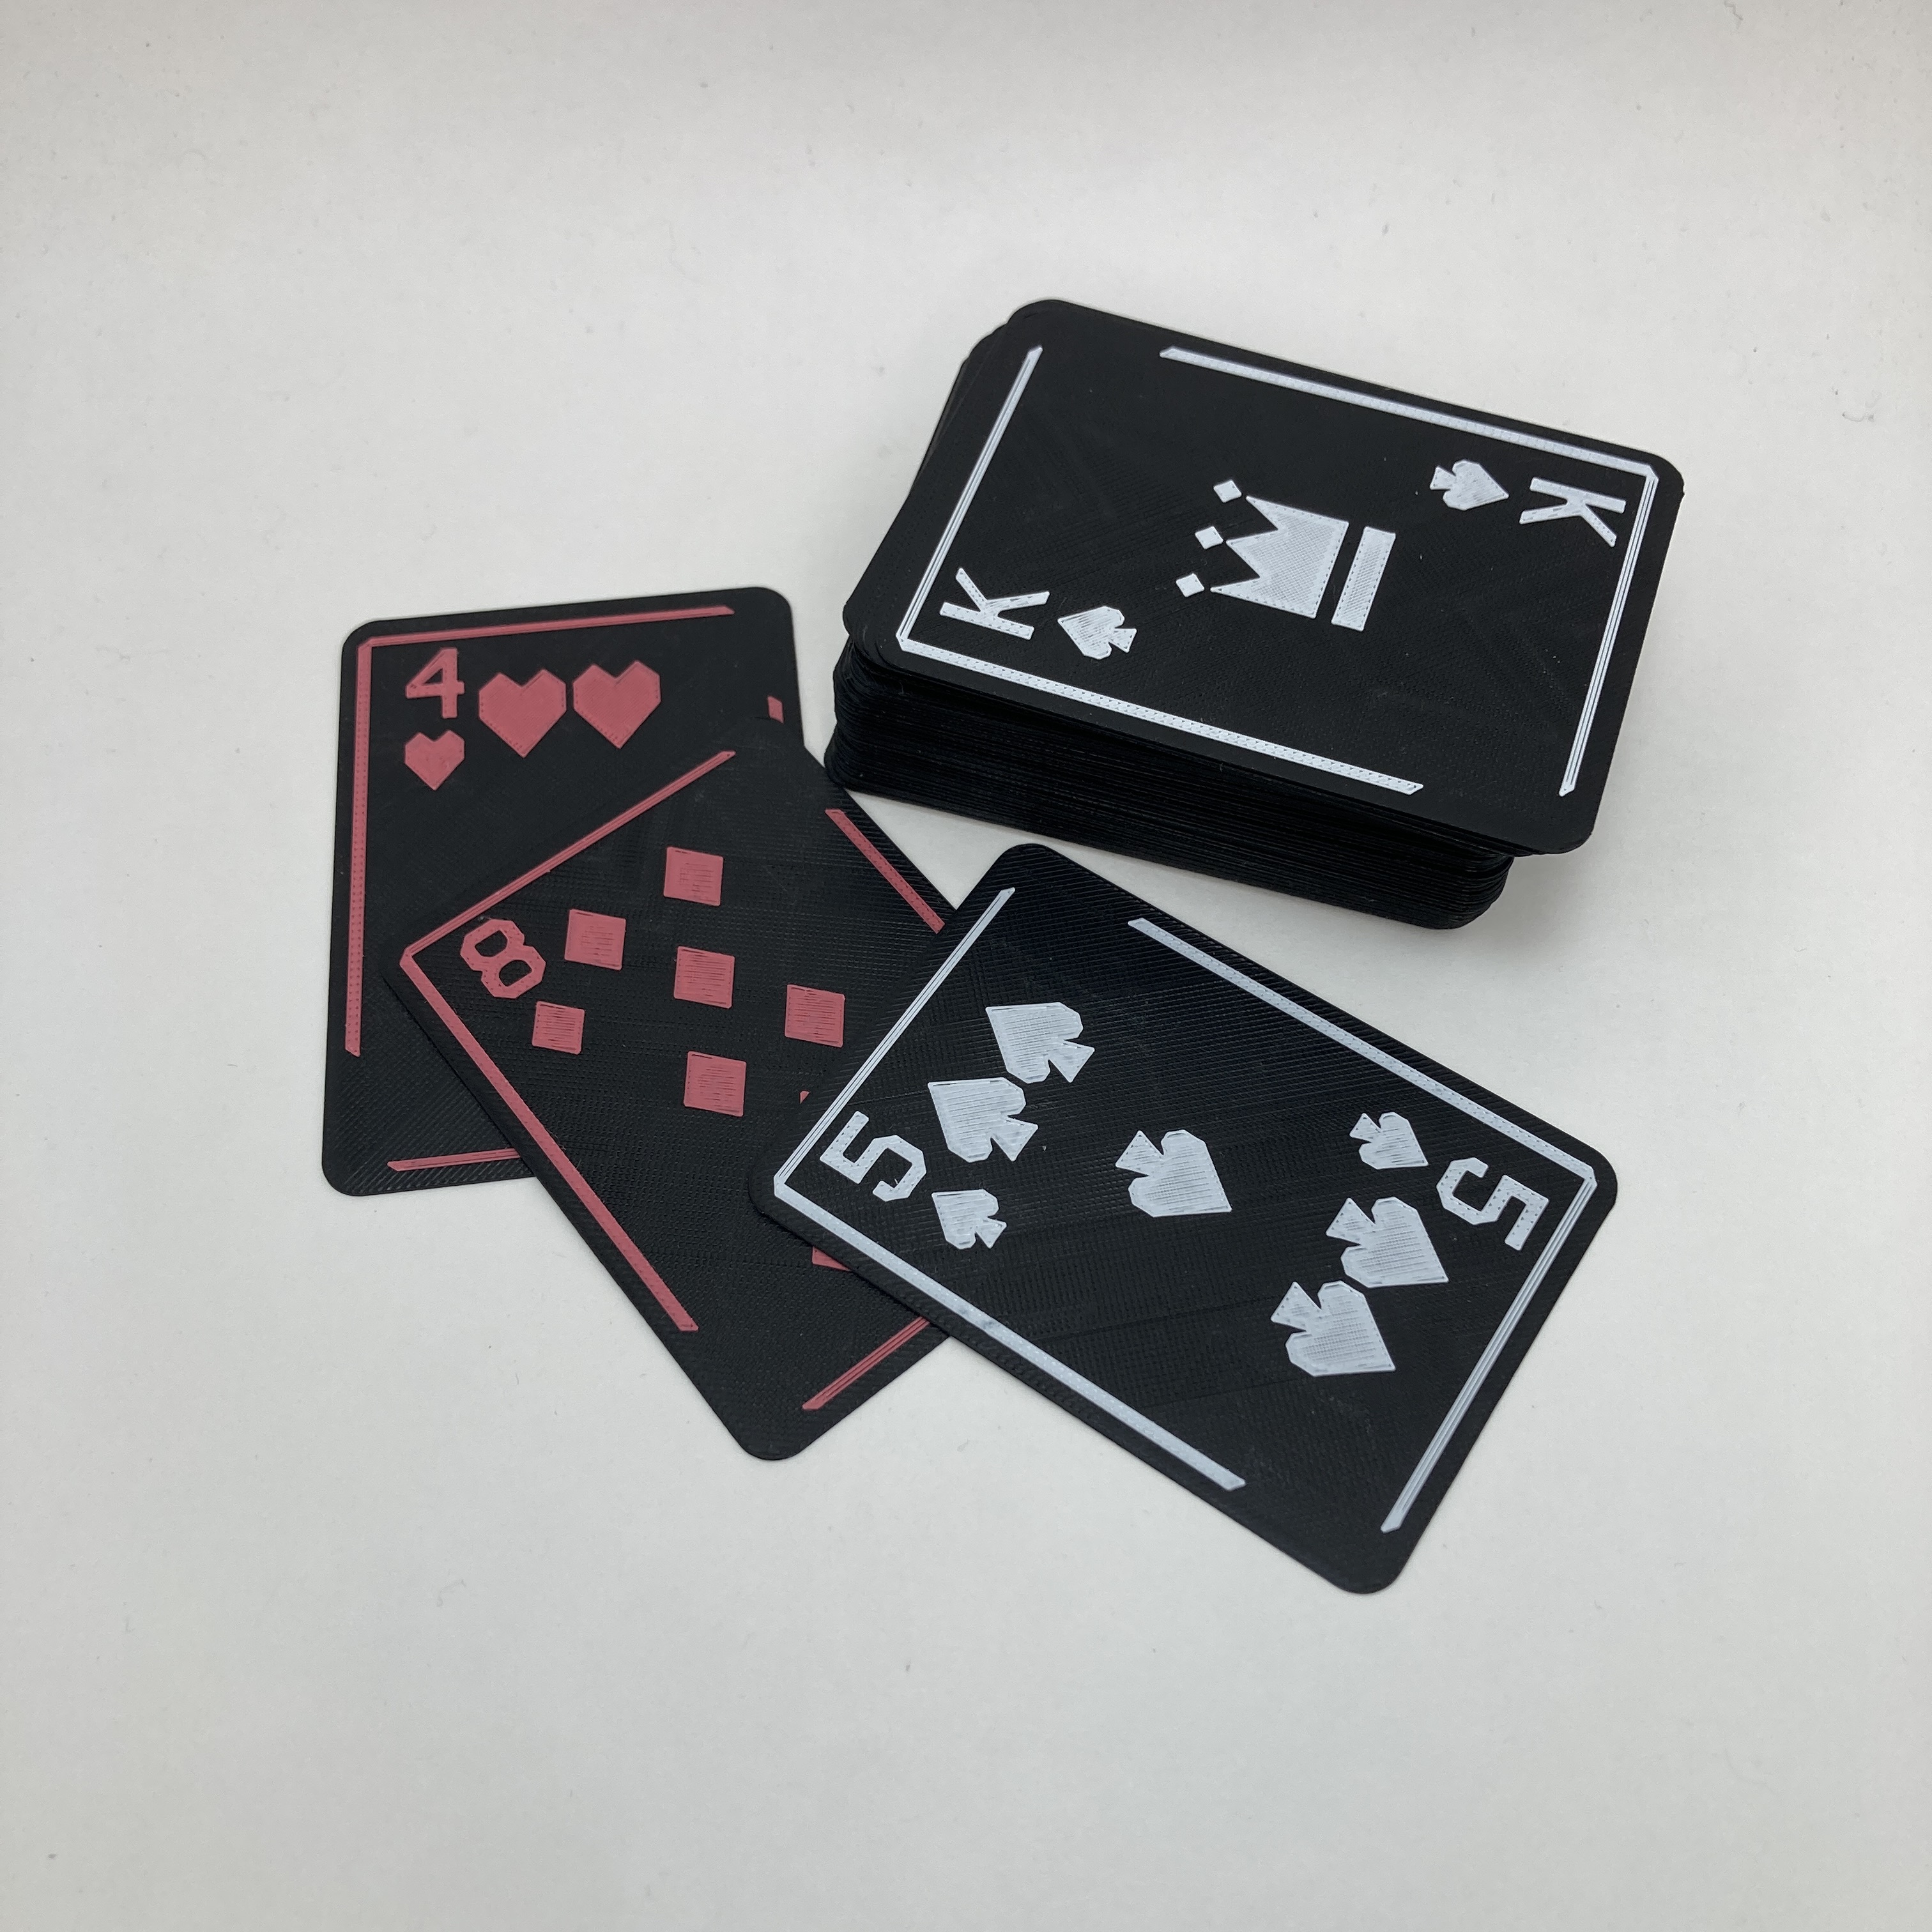
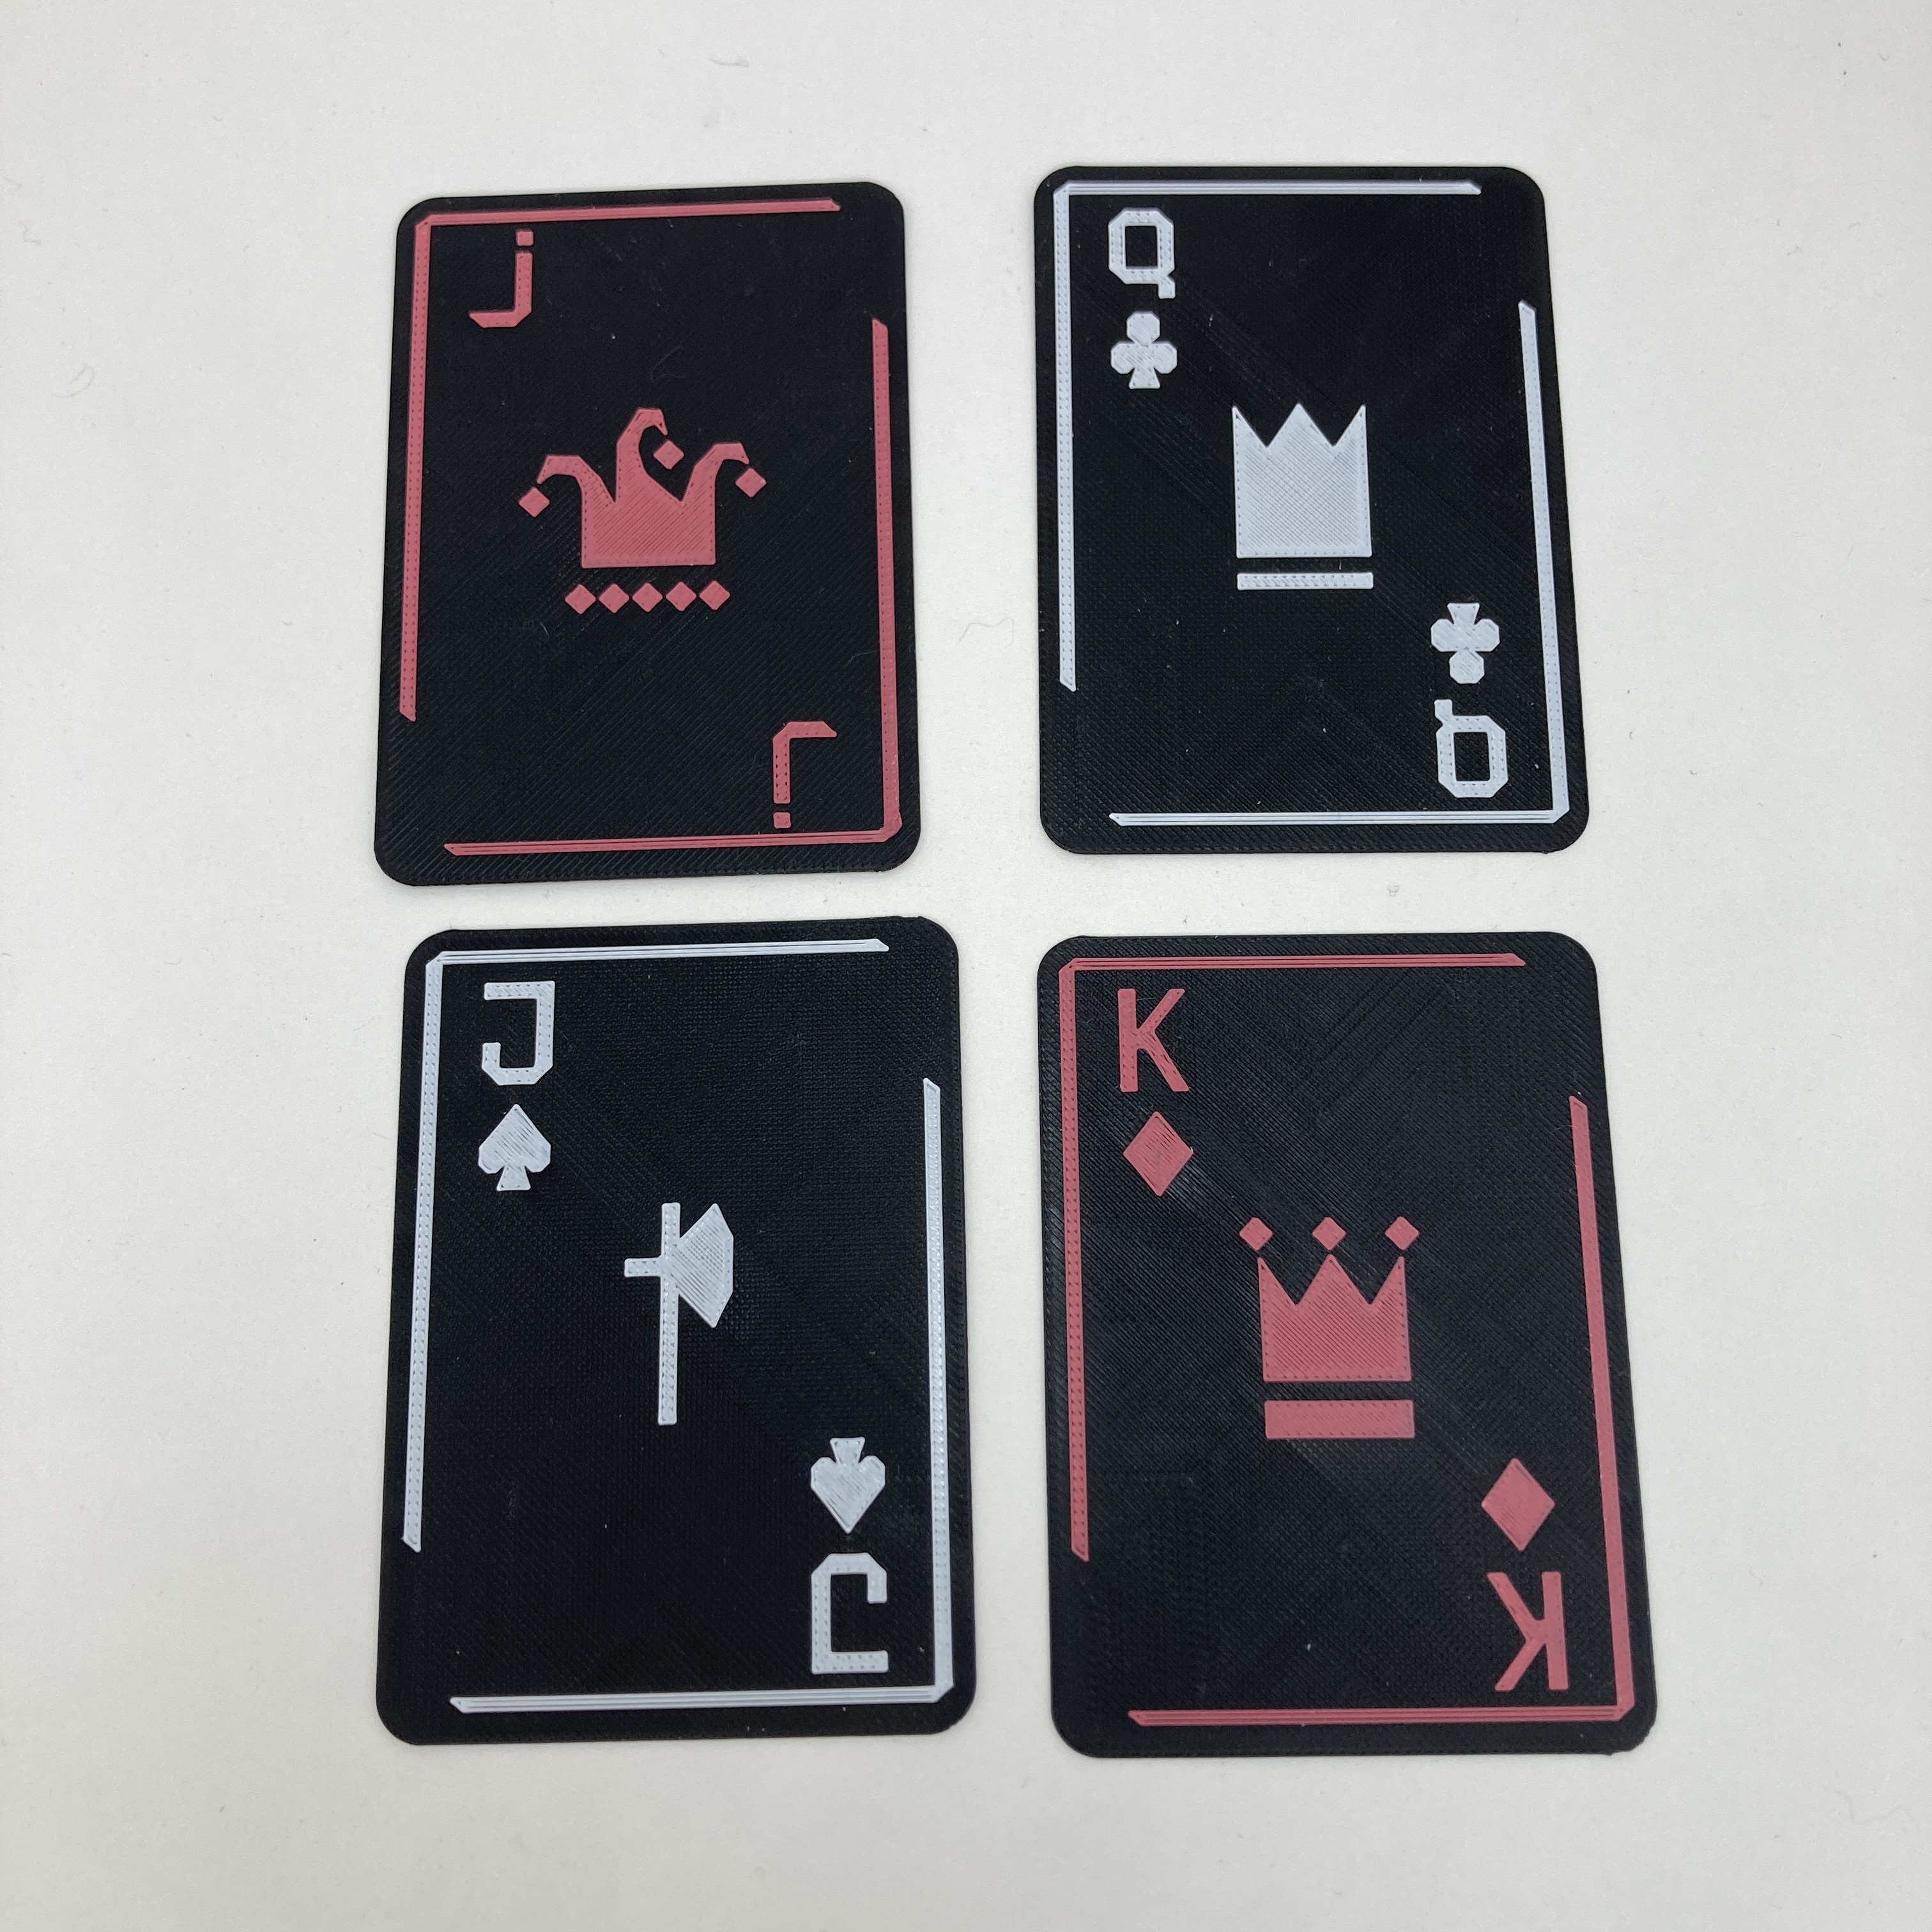
i think these cards turned out great and they were so easily printed over the course of the weekend, i'd just have to get up every once in a while to change the filament but that became really easily after a bit.
how to do this yourself
if you want to do this yourself, here's the tldr; on how to make these cards:
- get three different colors of filament, one is preferably darker and opaque for the card base.
- download the model from my thingiverse or printables.
- set up your print so the print pauses before layer 4.
- unload your first color of filament, load up one of the colors you want to use for the card face.
- resume your print, it should take less than 5 minutes for the face to print.
- when the print completes, unload the filament and load back in the first color.
- repeat steps 3-6 until you have all 54 cards printed.
here's also some slicer settings that i used just in case because i have no idea what slicer you're using:
happy printing!
